Knowledge Base
📌 Overview
The Knowledge Base is your organization's central hub for storing, managing, and discovering shared content. Upload files, organize them into folders, and share them with your team — then use Ask Quinn to instantly find answers from across all your uploaded documents. It's like having a smart search engine built on top of your own training materials.
✅ Step-by-Step Instructions
Flow 1: Ask Quinn a Question
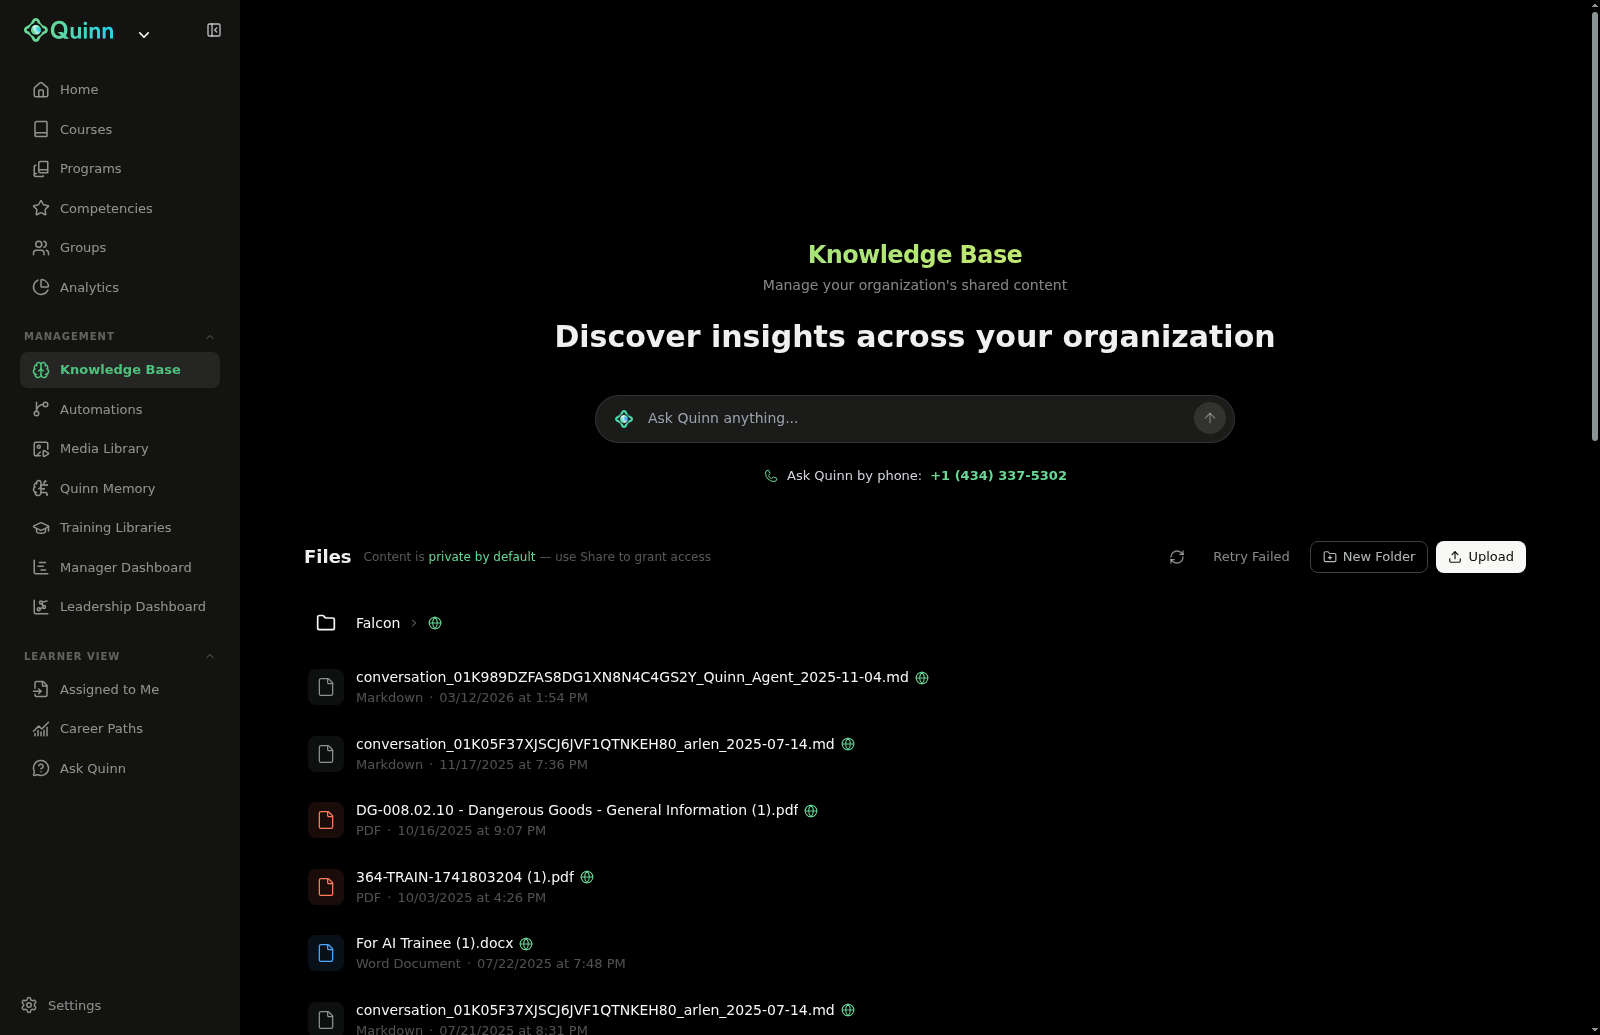
Step 1: Open the Knowledge Base
From the left sidebar, navigate to the Knowledge Base page. You'll see the main dashboard with the "Ask Quinn anything..." search bar at the top, followed by your Files section below.
💡 Tip: You can also ask Quinn by phone using the number shown below the search bar.
Step 2: Type Your Question
Click into the "Ask Quinn anything..." search bar and type your question. For example, type "What are the key safety protocols for HVAC work?" and press Enter or click the send button.
💡 Tip: Ask natural-language questions — Quinn understands full sentences, not just keywords.
Flow 2: Upload a File
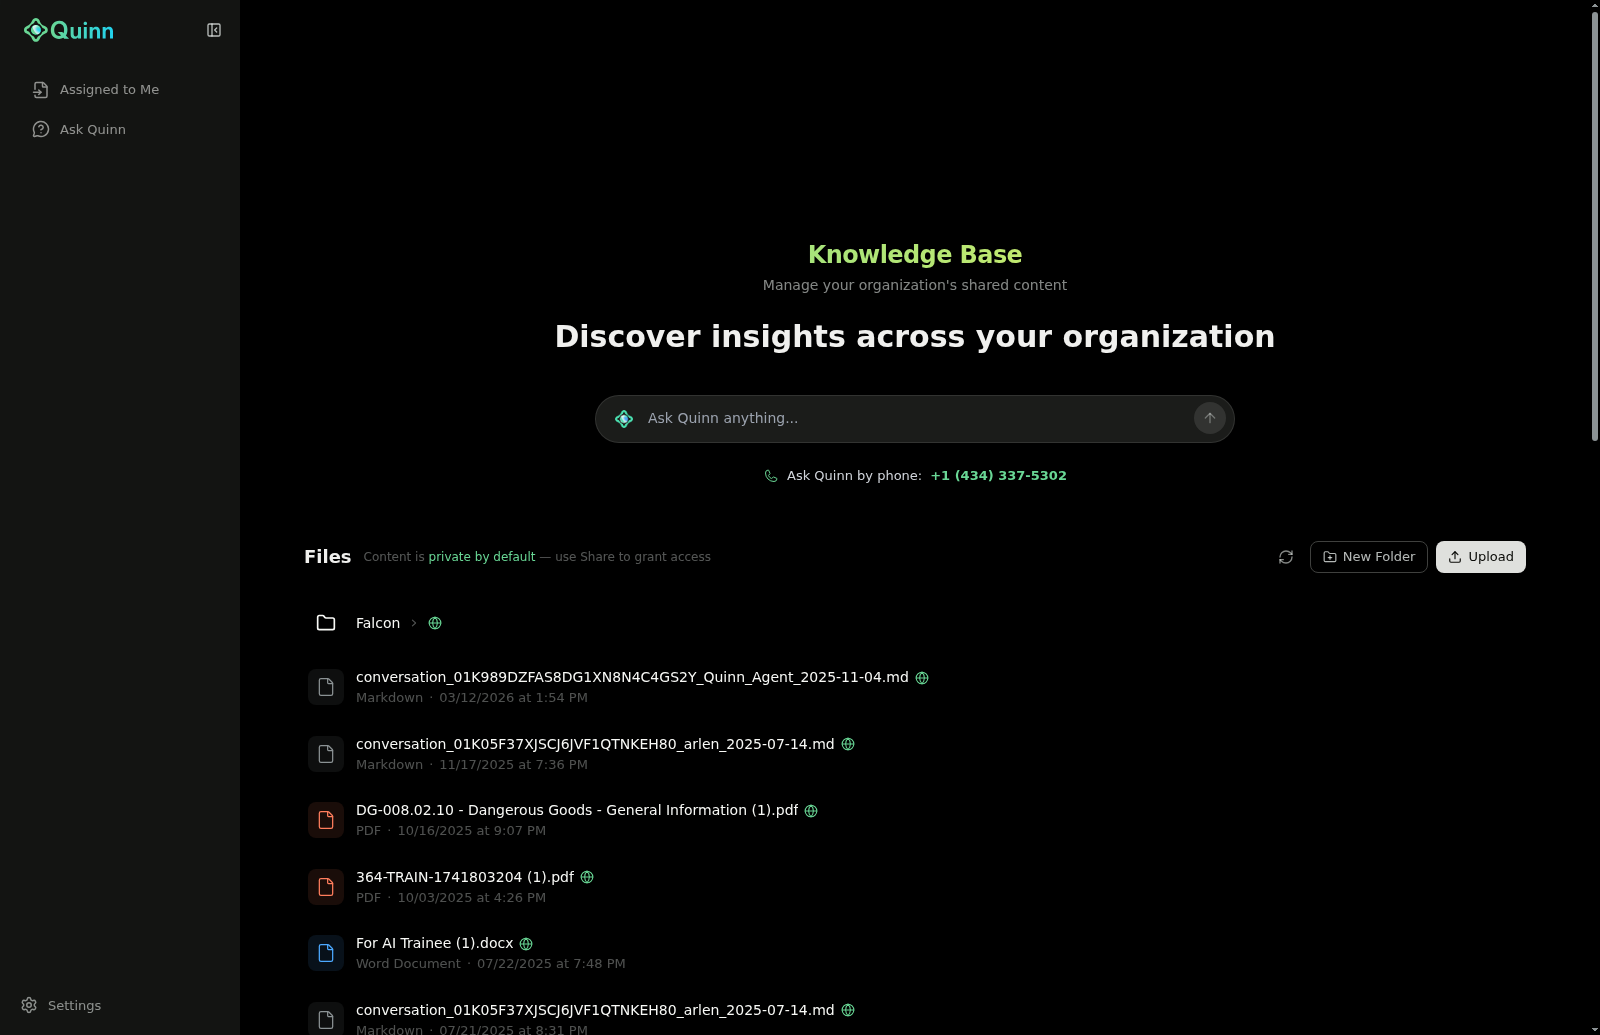
Step 5: Click the Upload Button
In the Files section, click the Upload button in the top-right corner. A file picker dialog will open, allowing you to select a file from your computer.
💡 Tip: You can upload PDFs, Word documents, text files, markdown, and more.
Step 6: File Uploaded Successfully
After selecting a file, it uploads immediately and appears in your file list. You'll see the file name, file type, and upload timestamp. The new file is now part of your Knowledge Base and can be searched by Quinn.
💡 Tip: Content is private by default — use the Share feature to grant access to your organization.
Flow 3: Share a File or Folder
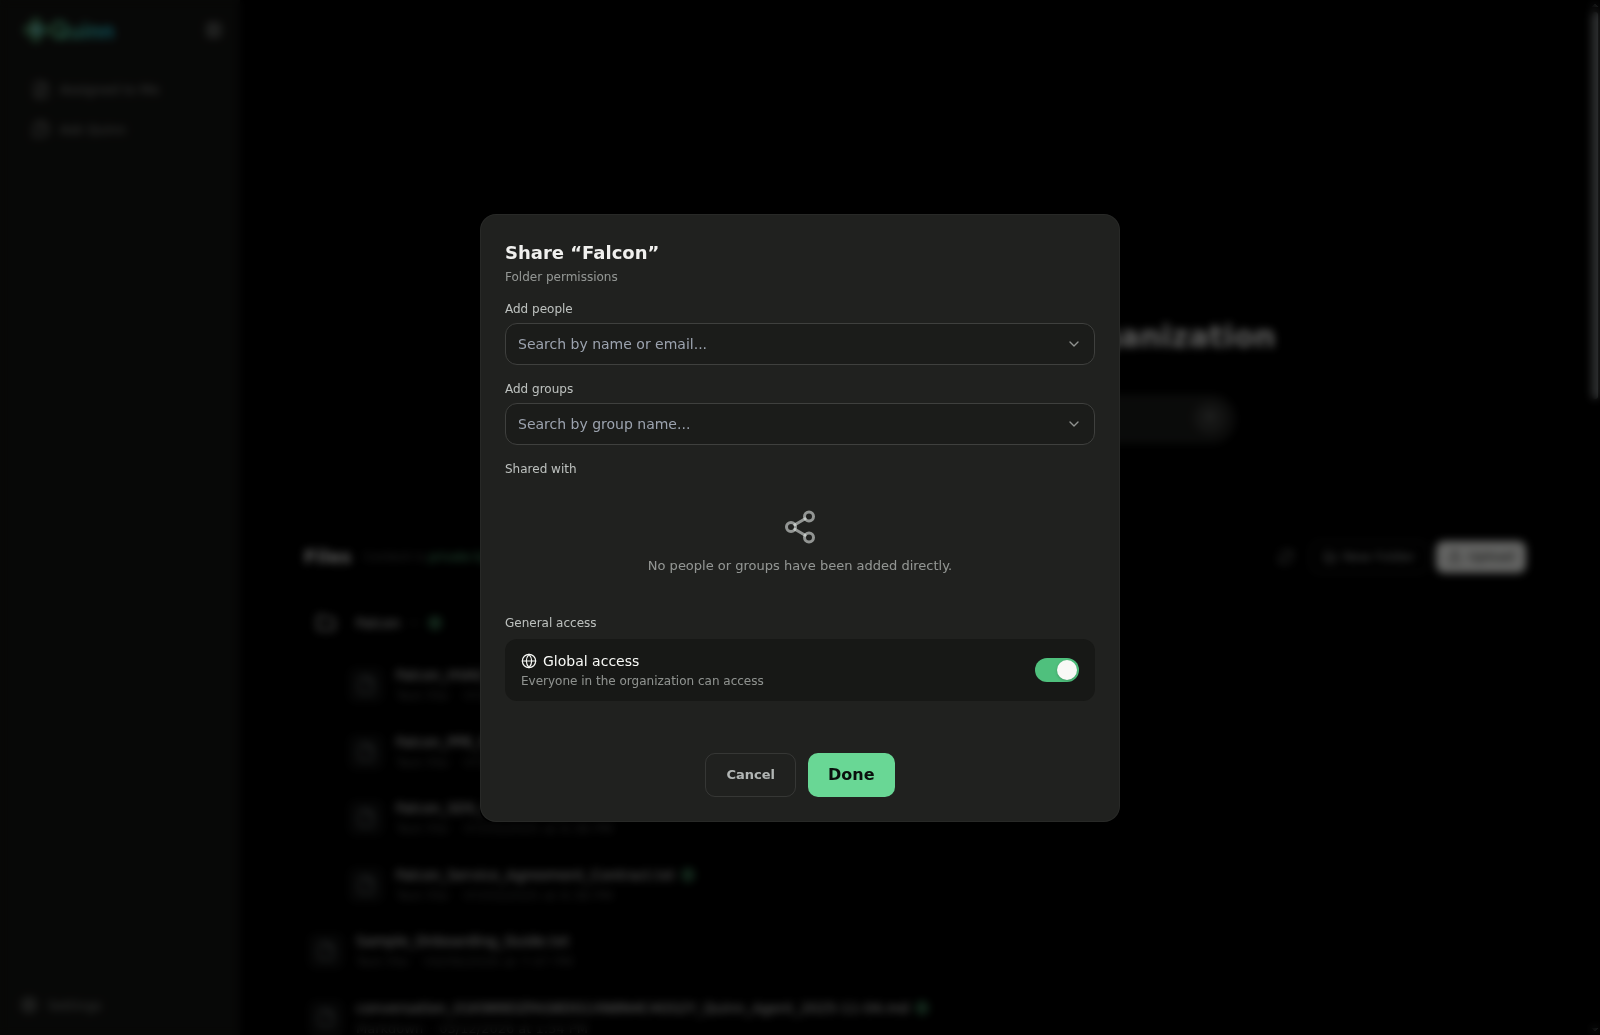
Step 7: View Folder Contents and Share Status
Click on a folder name (e.g., "Falcon") to expand it and view its contents. Files inside may show a globe icon next to their name, indicating they are shared with the organization.
💡 Tip: The green globe icon means the file or folder has Global access enabled — everyone in your organization can see it.
Step 8: Open the Share Modal for a Folder
Click the share icon (next to the folder name) to open the Share modal. Here you can manage folder permissions: add specific people or groups, and control General access settings.
💡 Tip: Sharing a folder controls access to all files inside it.
Step 9: Locate File Action Icons
Hover over any file in the list to reveal the action icons on the right side. These include options to share, preview, download, and more.
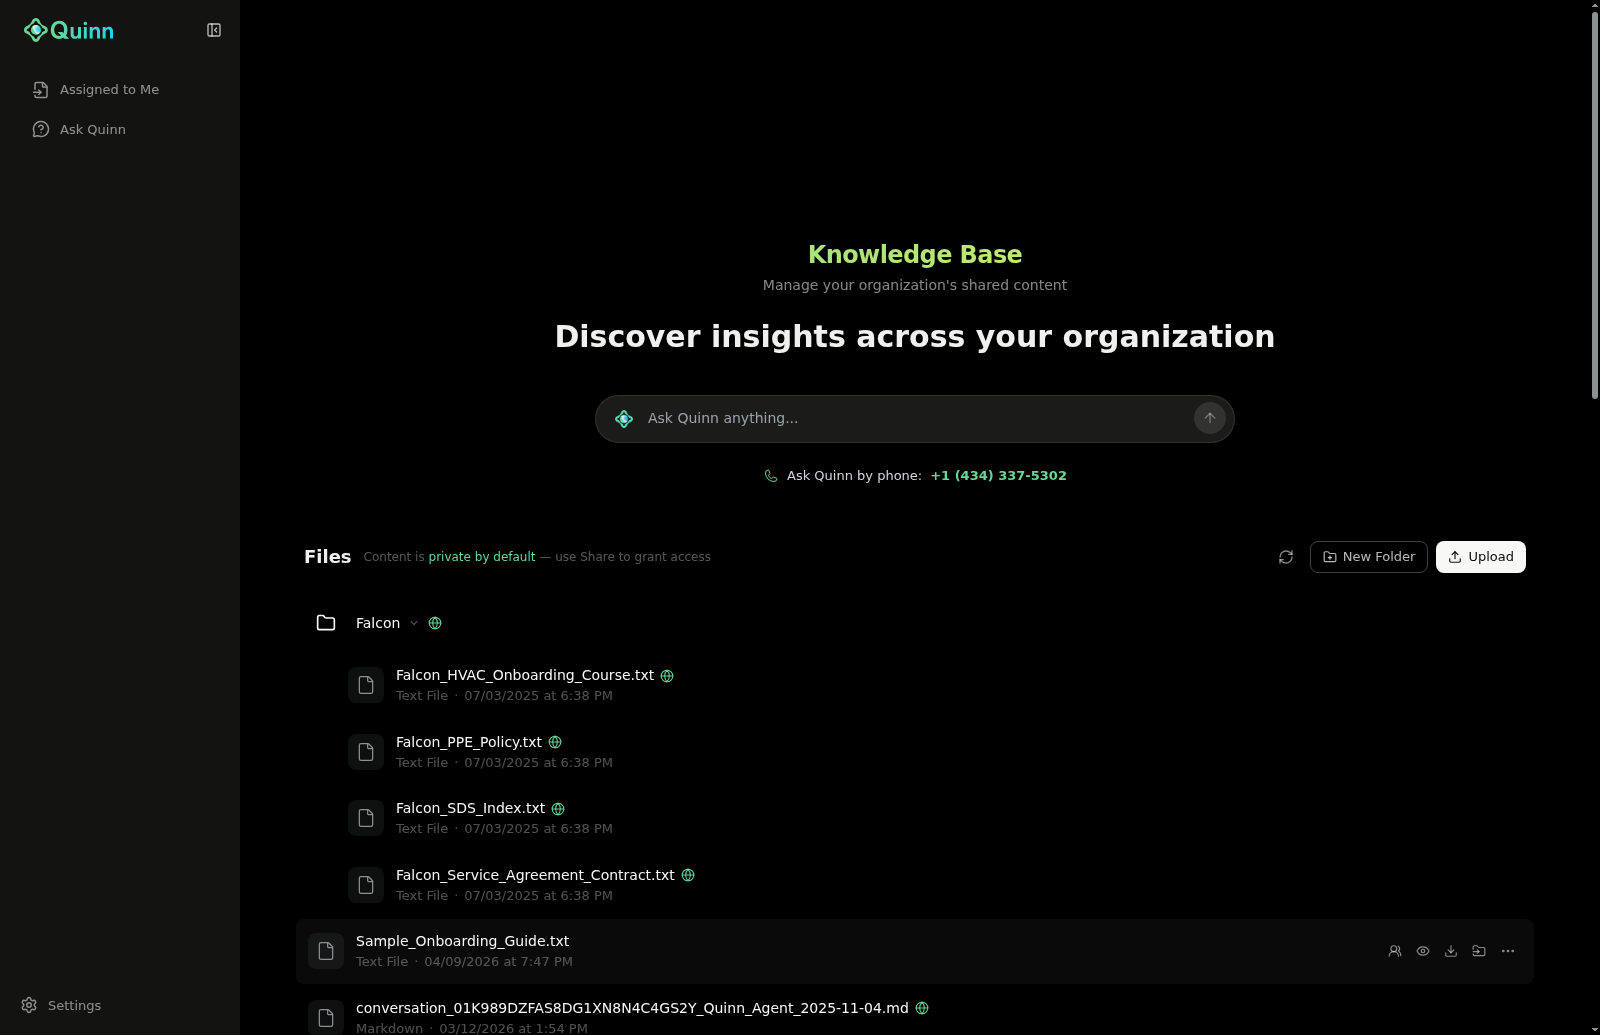
💡 Tip: The first icon (people/share icon) opens the sharing permissions for that individual file.
Step 10: Open the Share Modal for a File
Click the share icon on a file to open its Share modal. The modal shows the same options as folder sharing: Add people, Add groups, a Shared with list, and a General access toggle.
💡 Tip: By default, files are set to Restricted — only you can see them until you share.
Step 11: Enable Global Access
Toggle the Global access switch to on (blue) to share the file with everyone in your organization. You'll see a confirmation banner that reads "Access updated". Click Done to save.
💡 Tip: You can switch back to Restricted at any time to revoke organization-wide access.
Flow 4: Show Shared Files to Learners
By default, only admins can see the Knowledge Base. You can enable a dedicated Shared Files page so that non-admin learners can view and download any files you've shared with them.
Step 12: Open Organization Settings
From the left sidebar, go to Settings (the gear icon). Navigate to the General settings tab for your organization.
Step 13: Enable "Show Shared Files Page"
Scroll down to the Show Shared Files Page toggle. When enabled, non-admin learners can view and download shared files from the Knowledge Base on a dedicated Shared Files page in their sidebar.
Toggle the setting to Enabled and save.
💡 Tip: This setting only controls visibility — learners will only see files or folders that have been shared with them (via people, groups, or Global access). Private files remain hidden.
What Learners See
Once enabled, learners will see a new Shared Files entry in their left sidebar navigation. Clicking it opens a page listing all files and folders that have been shared with them. They can browse folders, preview files, and download them.
💡 Tip: If you don't see the Shared Files page after enabling the setting, make sure you've actually shared files or folders with the learner's group or with Global access.
Flow 5: Share with an Office Location
Alongside people and groups, you can share a file or folder with an office location. Everyone assigned to that location gets access, and the list stays correct on its own as people join, move, or leave the location.
Step 14: Open the Share Modal
Hover the file or folder in the Knowledge Base list and click the share icon. Content is private by default, so nothing is visible to your team until you share it here.

Step 15: Search Under "Add locations"
In the share modal you'll now see three pickers: Add people, Add groups, and Add locations. Click Add locations and use Search by location name... to find the office you want, then select it.
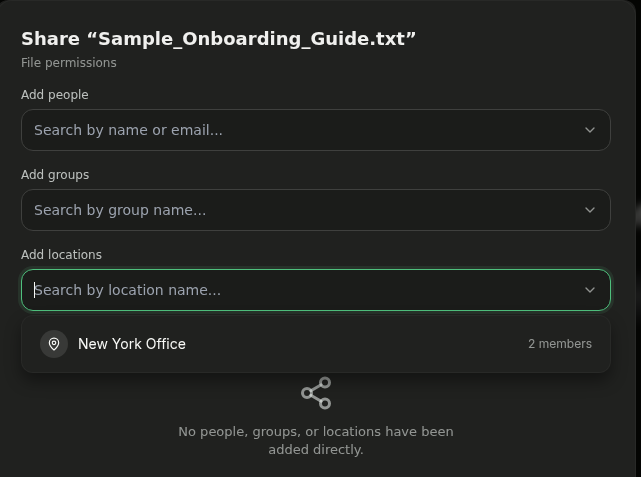
💡 Tip: Each result shows the number of members currently assigned to that location, so you can see how many people you're granting access to.
Step 16: Review and Save
Selected locations appear under Will be shared with before you save. Click Share to confirm — you can combine locations with individual people and groups in the same action.
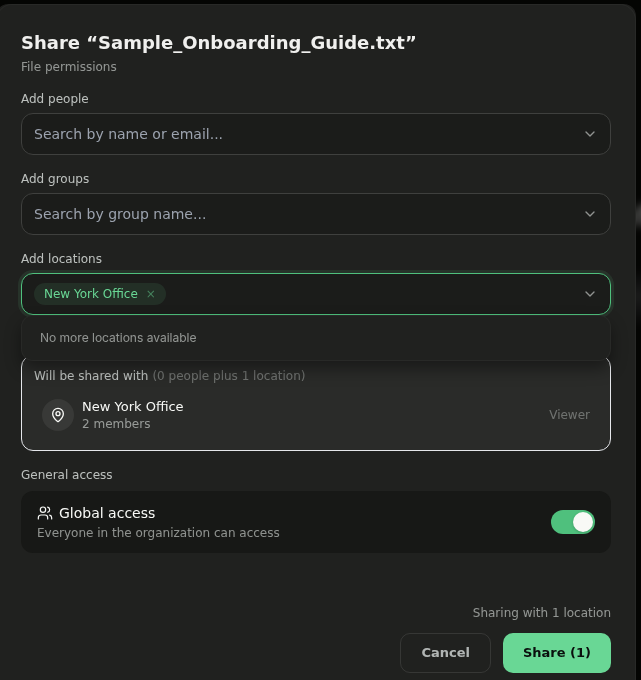
Step 17: Confirm the New Access
The location now appears in the Shared with list with its member count. Everyone assigned to that office location gets Viewer access to the file — or to the folder and everything inside it. Use Remove to revoke it, then click Done.
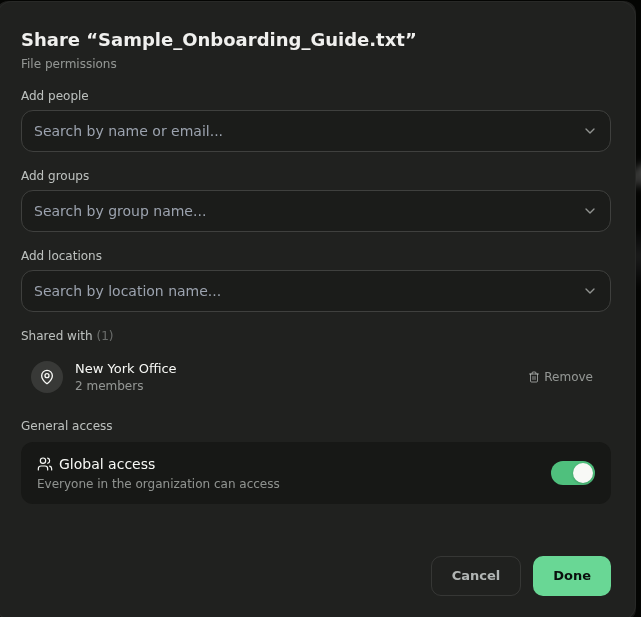
💡 Tip: Access is checked as people open the file, so anyone added to the location later gets access automatically — and anyone removed from it loses access.