Request Documents
📌 Overview
Request Documents lets you collect files, recordings, and notes from your team — all in one place. Use the guided wizard to create a request, choose which collection tools to allow, and share a link or assign recipients directly. Learners see pending requests on their dashboard and can respond right away.
Step 1: Open the Knowledge Base
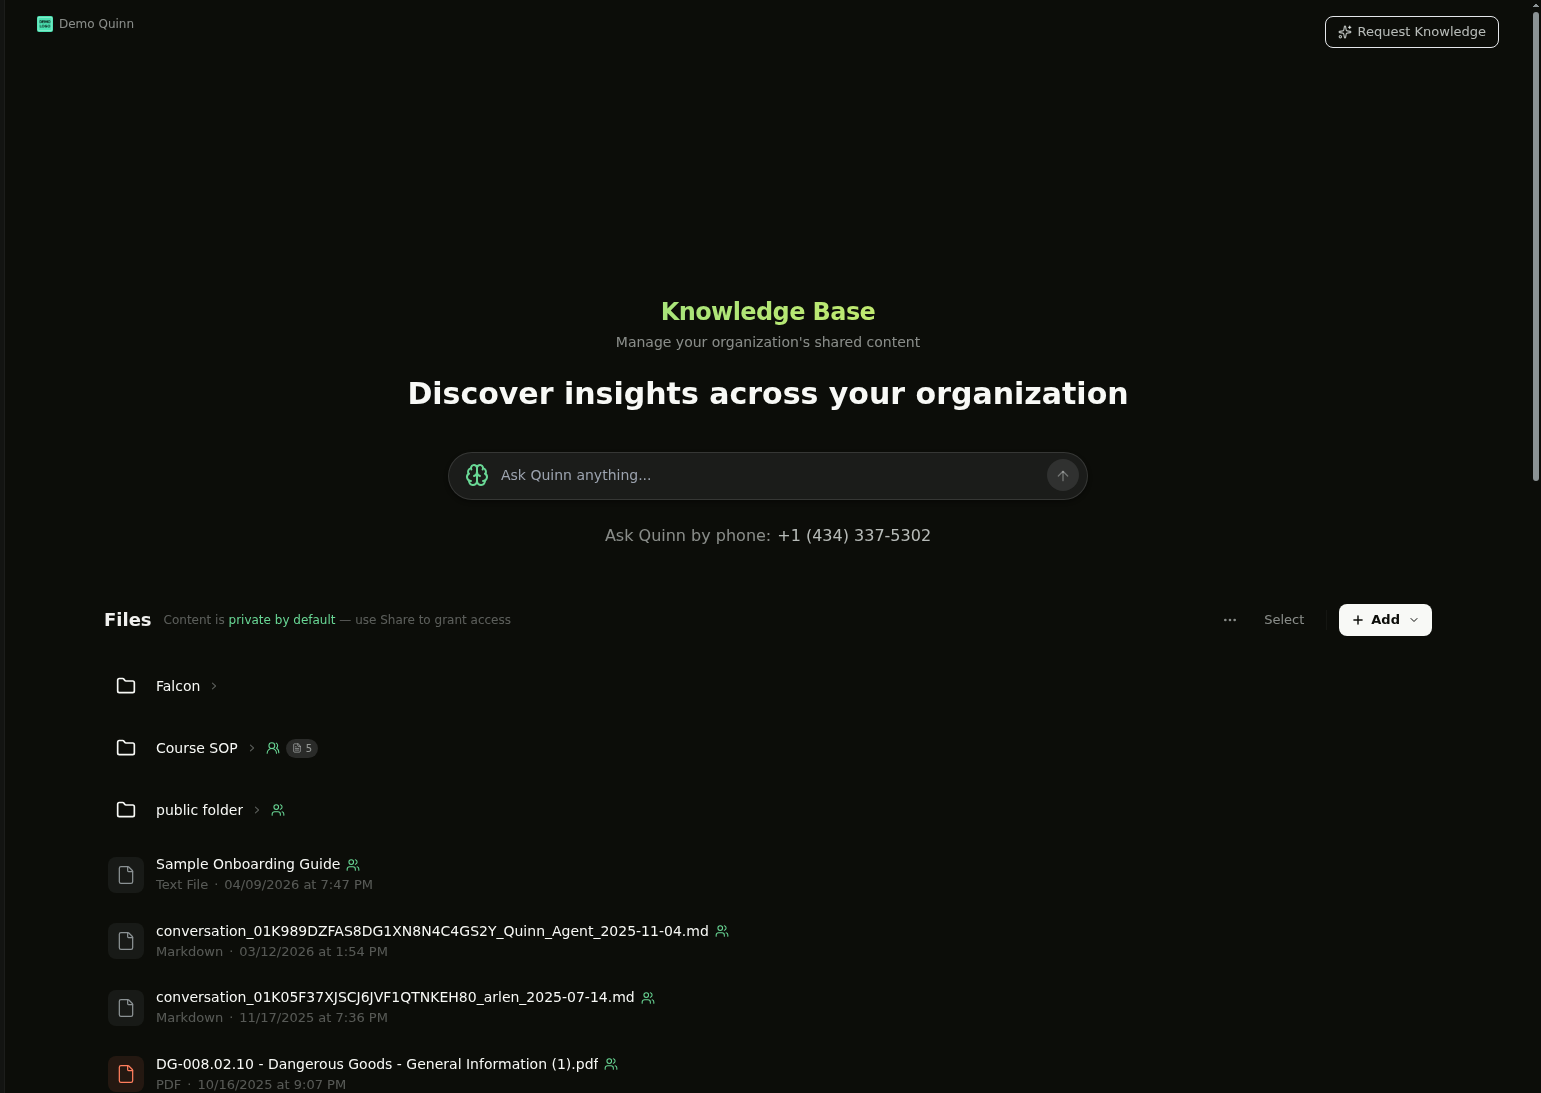
From the left sidebar, click Knowledge Base. You'll see your files and folders along with the Request Knowledge button in the top-right corner.
Step 2: Launch the Request Wizard
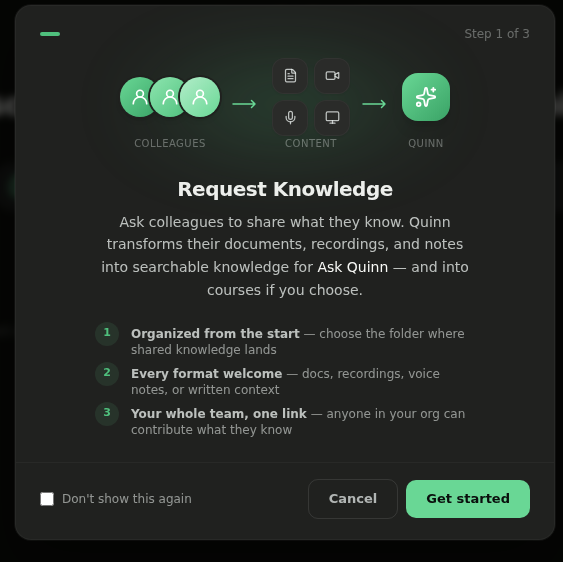
Click Request Knowledge to open the guided wizard. The first screen explains what document requests are — recipients will receive a link to upload files, recordings, or written responses directly into your Knowledge Base.
Click Get started to continue.
Step 3: Choose a Destination Folder
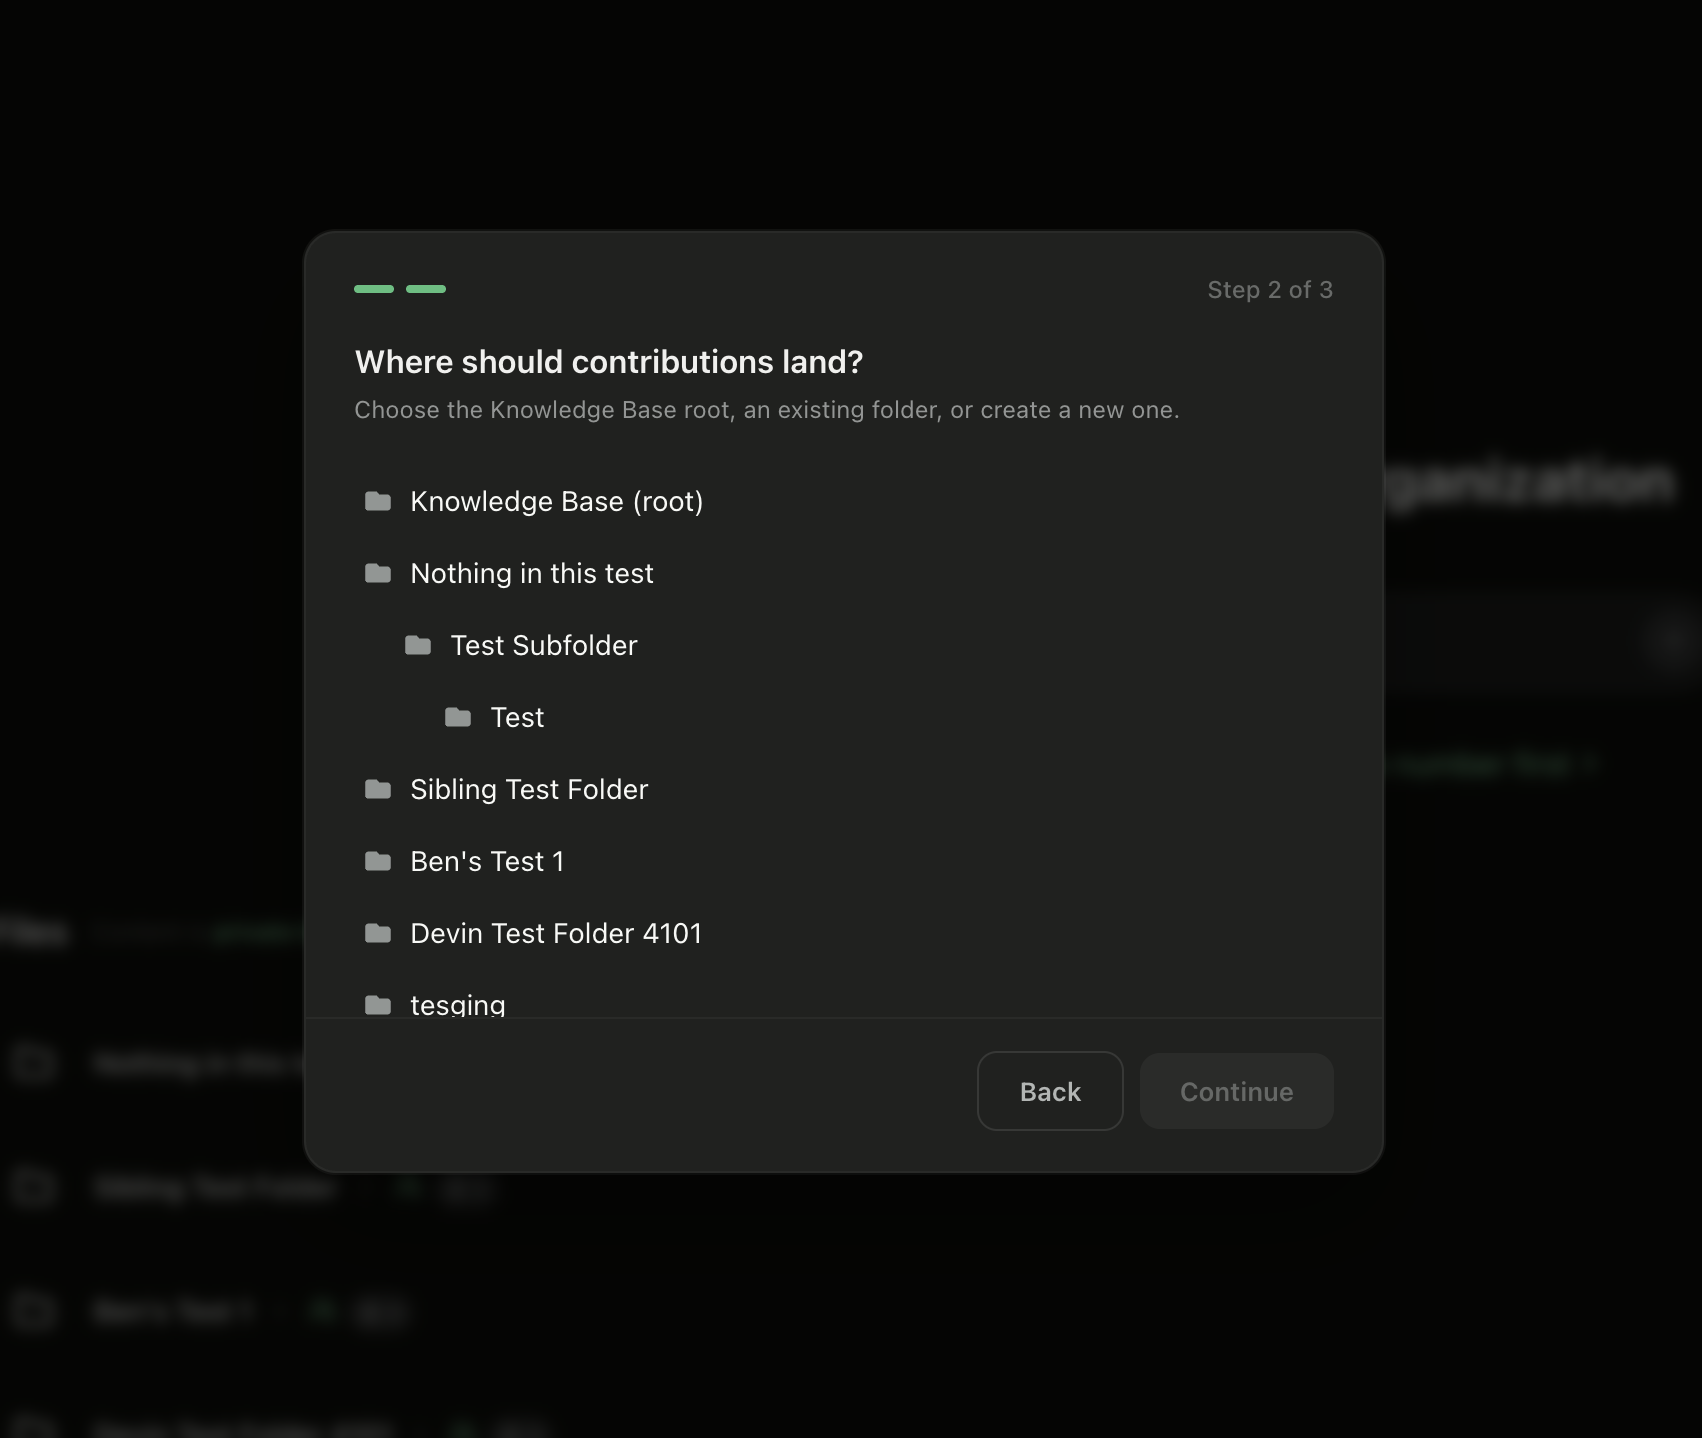
On Step 2 of the wizard, you'll see "Where should contributions land?" Choose the Knowledge Base (root), an existing folder, or a nested subfolder. The tree view expands to show subfolders so you can pick the exact location.
Click Continue after selecting your folder.
Step 4: Configure Collection Tools and Recipients
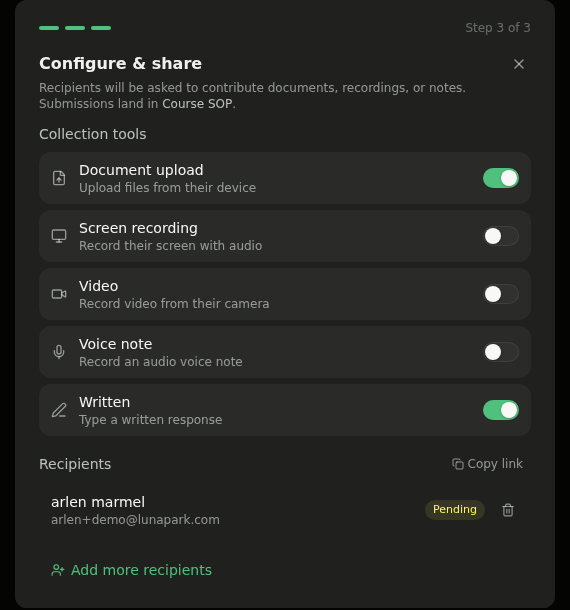
On the Configure & share screen, toggle which collection tools recipients can use: Document upload, Screen recording, Video, Voice note, or Written response. Enable or disable each one based on what you need.
Below the tools, add recipients by name or click Copy link to share the request URL with anyone in your organization. You can also click Add more recipients to invite additional people.
💡 Tip: You can update collection tools on an existing request at any time — open the folder, click Request Documents, and toggle tools on or off. Changes save automatically.
Step 5: Manage Requests Inside a Folder
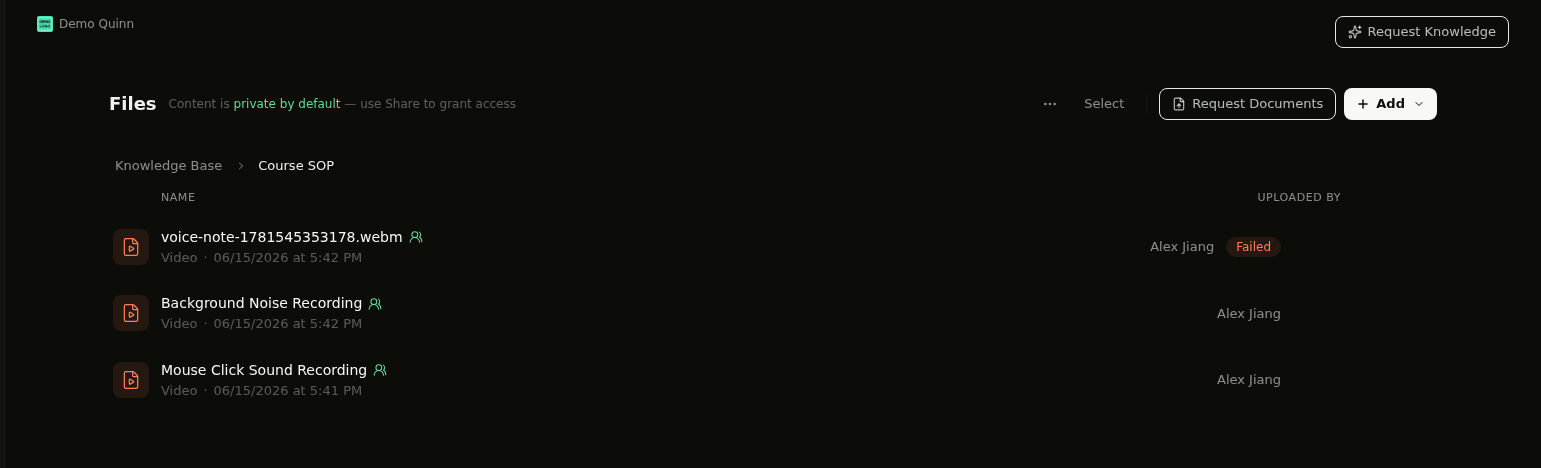
Once a request is active, open the destination folder to see uploaded submissions. The Request Documents button appears in the folder toolbar, showing a badge with the number of open requests. Click it to manage tool settings or add more recipients.
Step 6: Respond to a Document Request
When a learner opens a document request — from their dashboard or a share link — they see who requested it, what's needed, and the current status. Choose a collection tool (Upload, Screen, Video, Voice, or Written) and submit your response. Once finished, click Mark as Done to notify the requester.
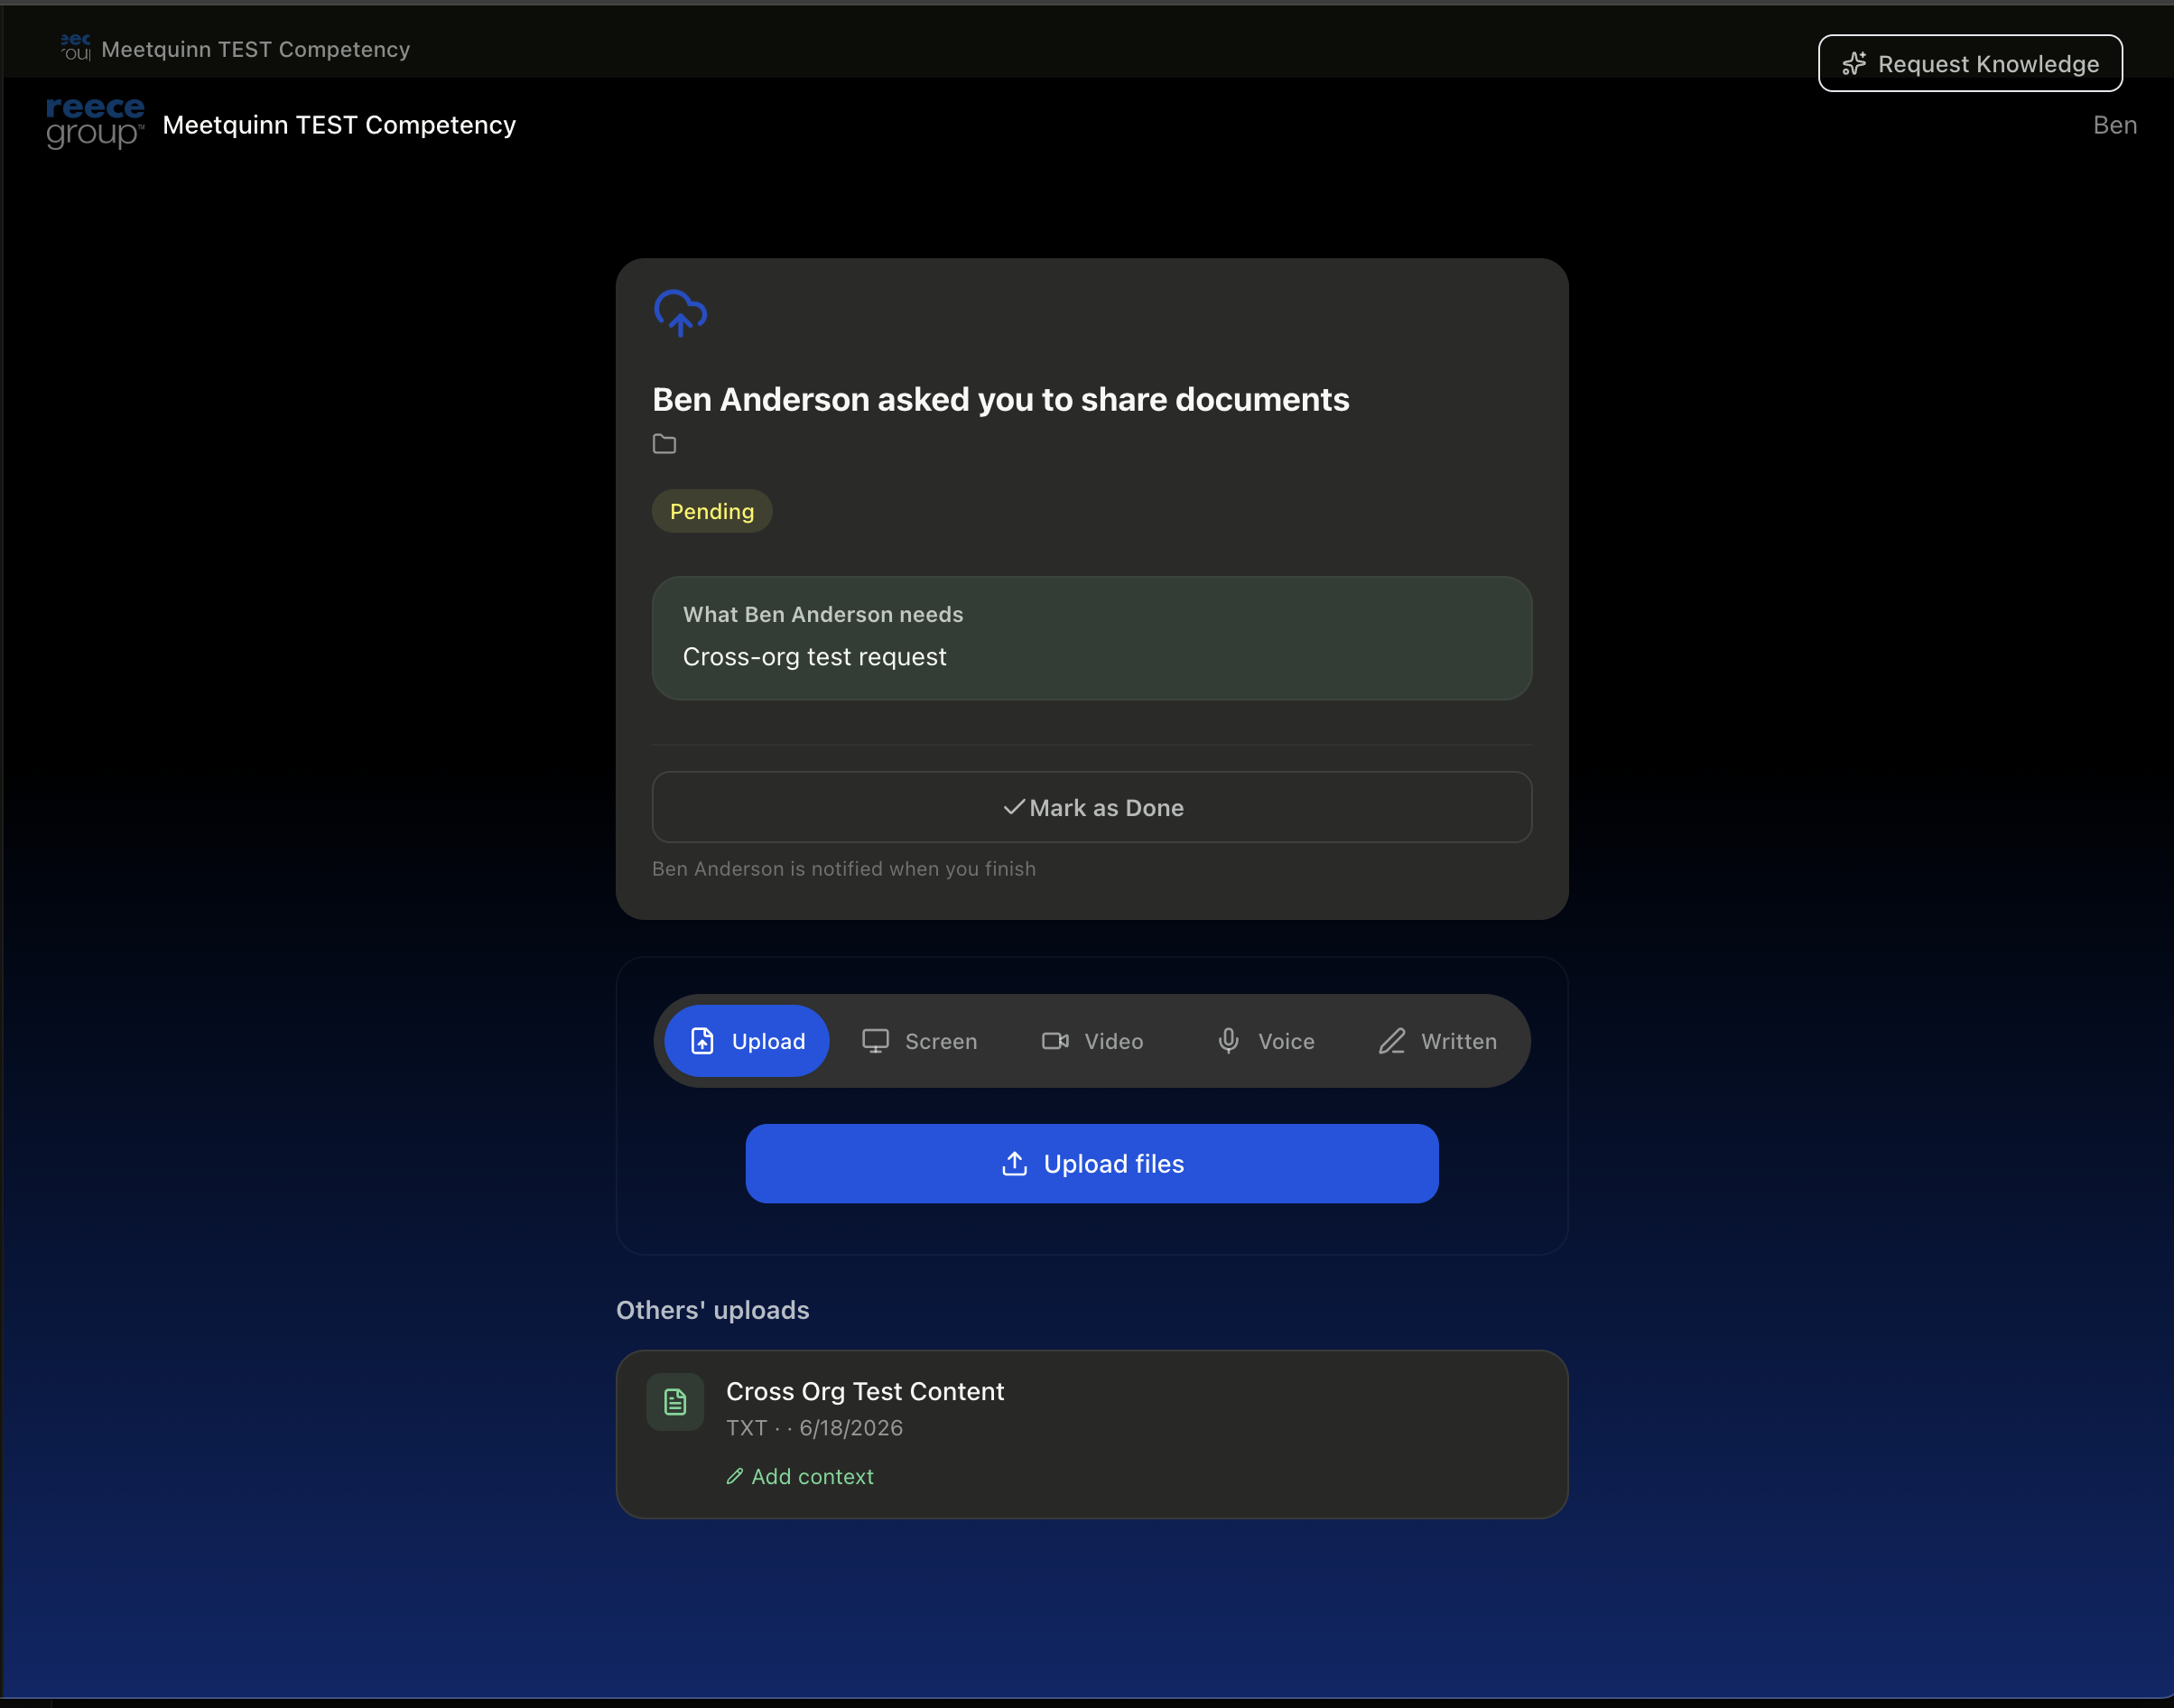
💡 Tip: The Others' uploads section at the bottom shows what teammates have already contributed to the same request.