Assign a Course for Review
📌 Overview
Need someone to check your course content before it goes live? Quinn lets admins assign courses for review — separate from regular training assignments. Reviewers can go through the course in Review Mode without affecting their own training progress or scores. You can invite reviewers by email, by group, or by subject matter expertise, set a due date, and track each reviewer's status directly from the course detail page — or from the Review Requests dashboard, which shows every review request across every course in one place.
Step 1: Open the Course Details Page
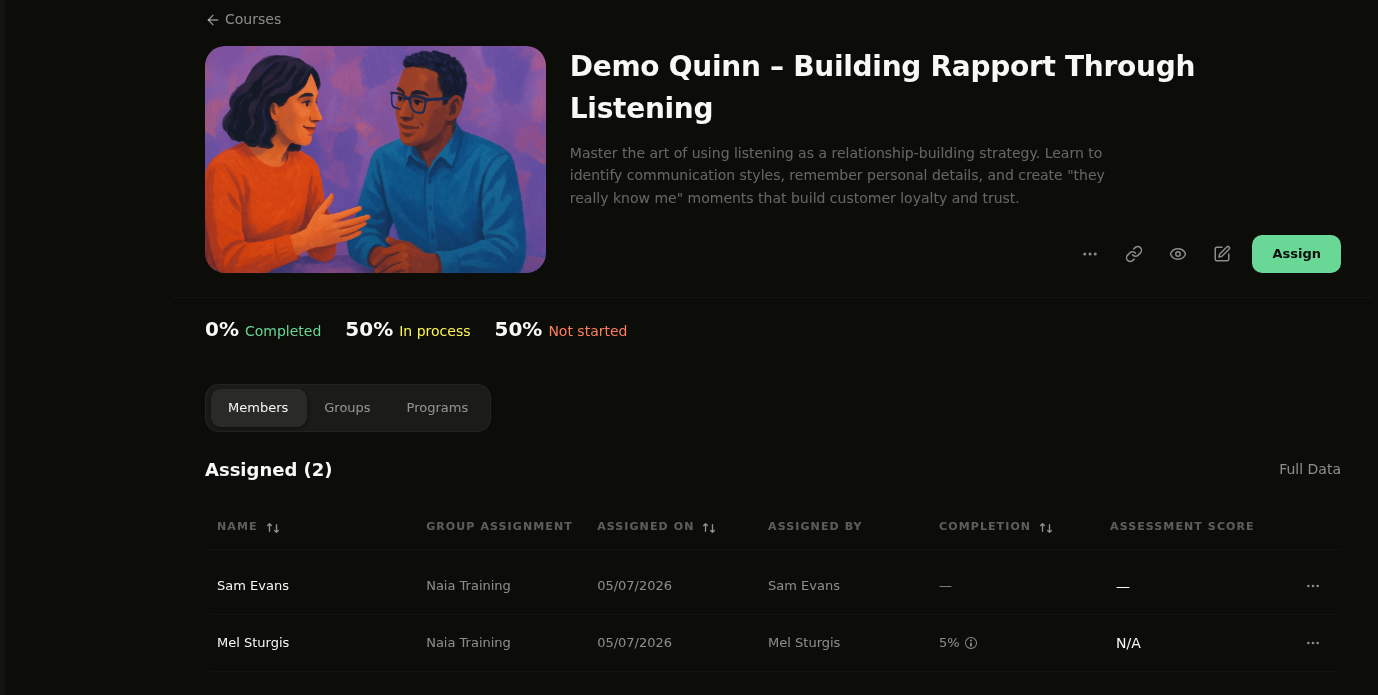
Navigate to Courses from the sidebar and select the course you'd like reviewed. You'll see the course header, completion stats, and the Assigned members table.
Step 2: Open the More Options Menu
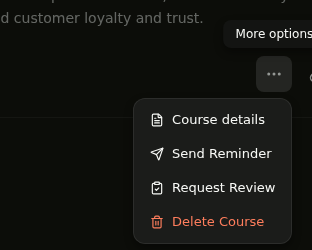
Click the ⋯ (more options) button in the top-right area of the course header. A dropdown menu will appear — select Request Review.
Step 3: Select Reviewers and Set a Due Date
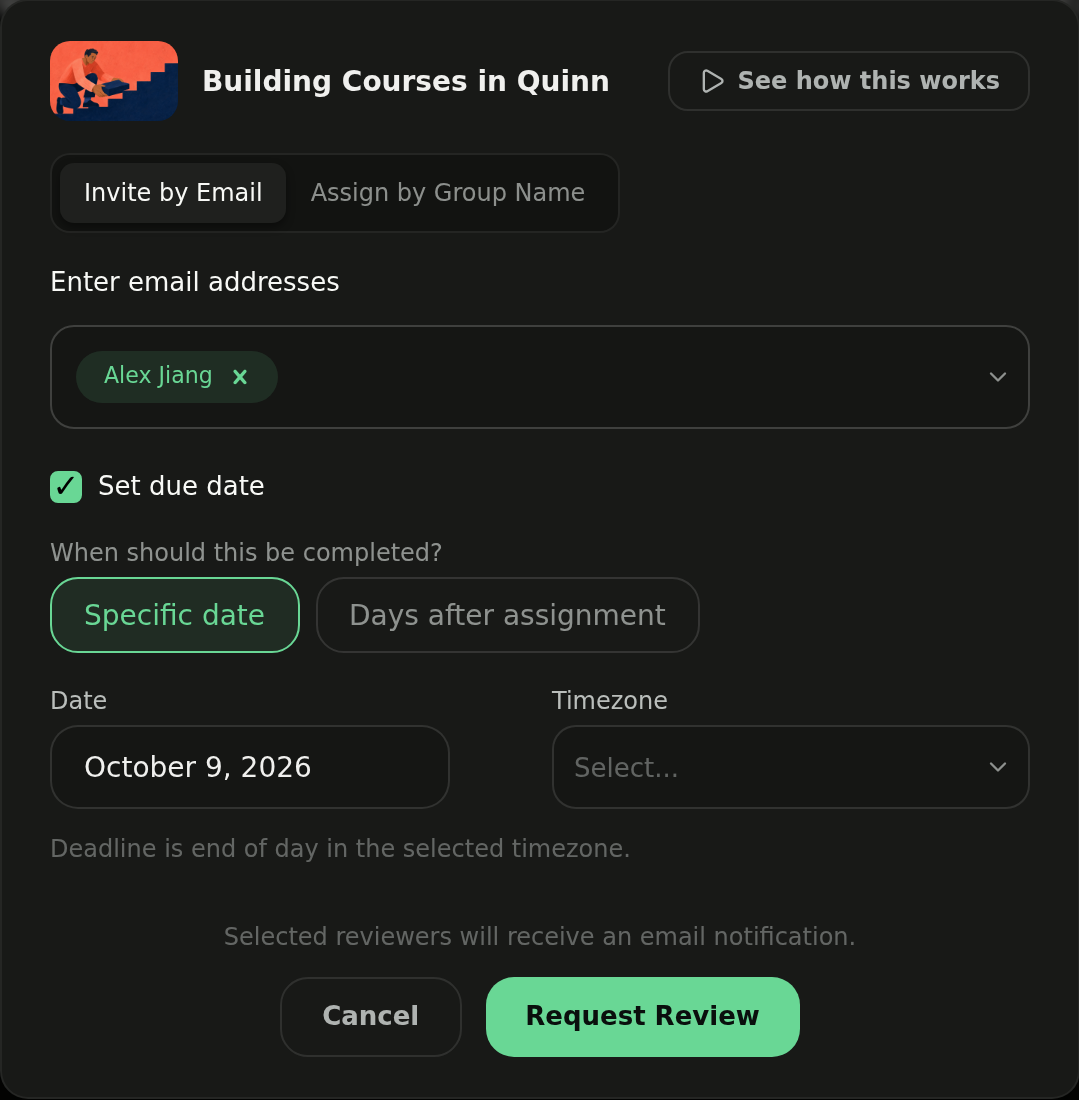
A modal will open where you can add reviewers. Use the Invite by Email tab to search and select team members, or switch to Assign by Group Name to add an entire group. Optionally check Set due date to choose a specific deadline or a number of days after assignment. Click Request Review to send the request — each reviewer will receive an email notification.
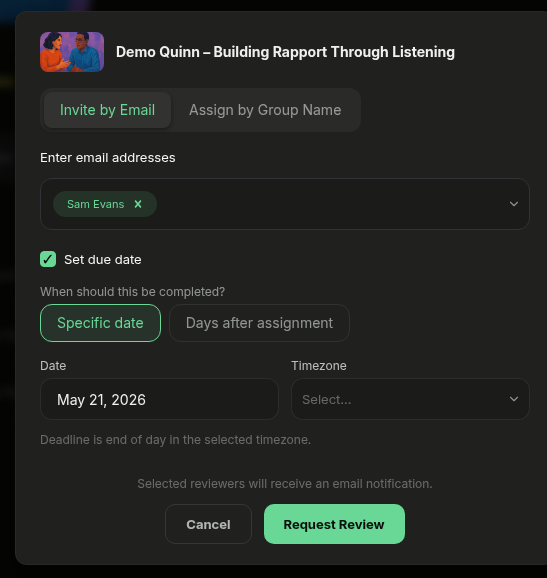
💡 Tip: You can set the due date as a Specific date or as Days after assignment — useful when you want a consistent turnaround time regardless of when the request is sent.
Step 4: Track Reviewer Status
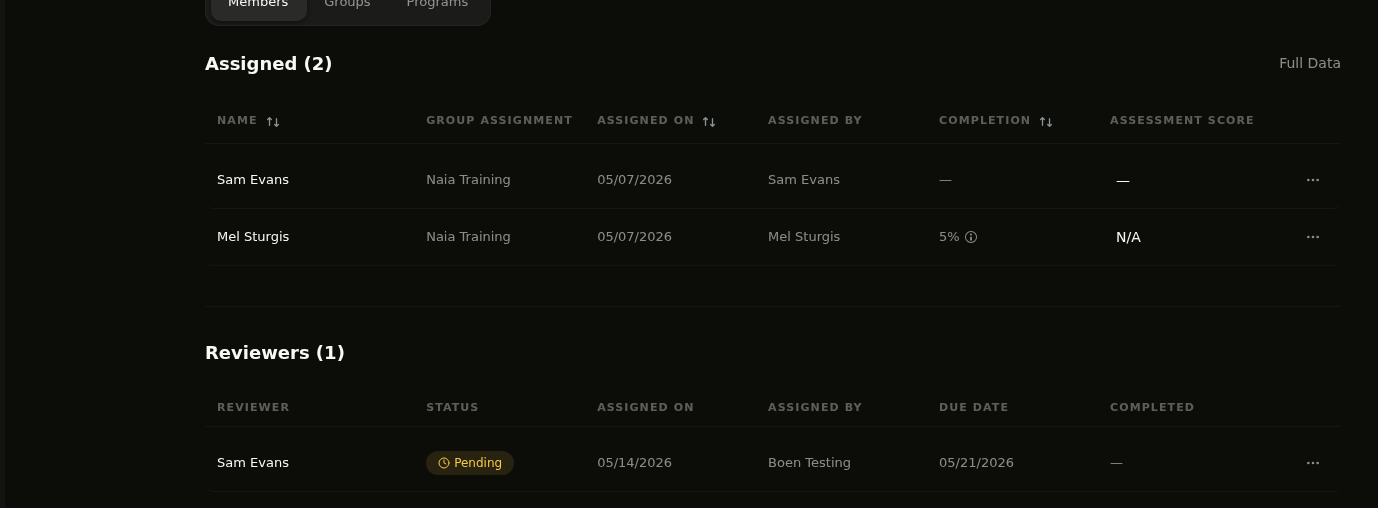
After submitting, a Reviewers table appears on the course detail page below the assigned members. It shows each reviewer's Status (Pending, In progress, or Completed), who assigned the review, the due date, and when it was completed. A request moves to In progress as soon as the reviewer starts — and to Completed only when they click Mark as Reviewed (see Step 11). Use the ⋯ button on each row to remove a reviewer if needed.
Step 5: Reviewer Gets an Email Notification
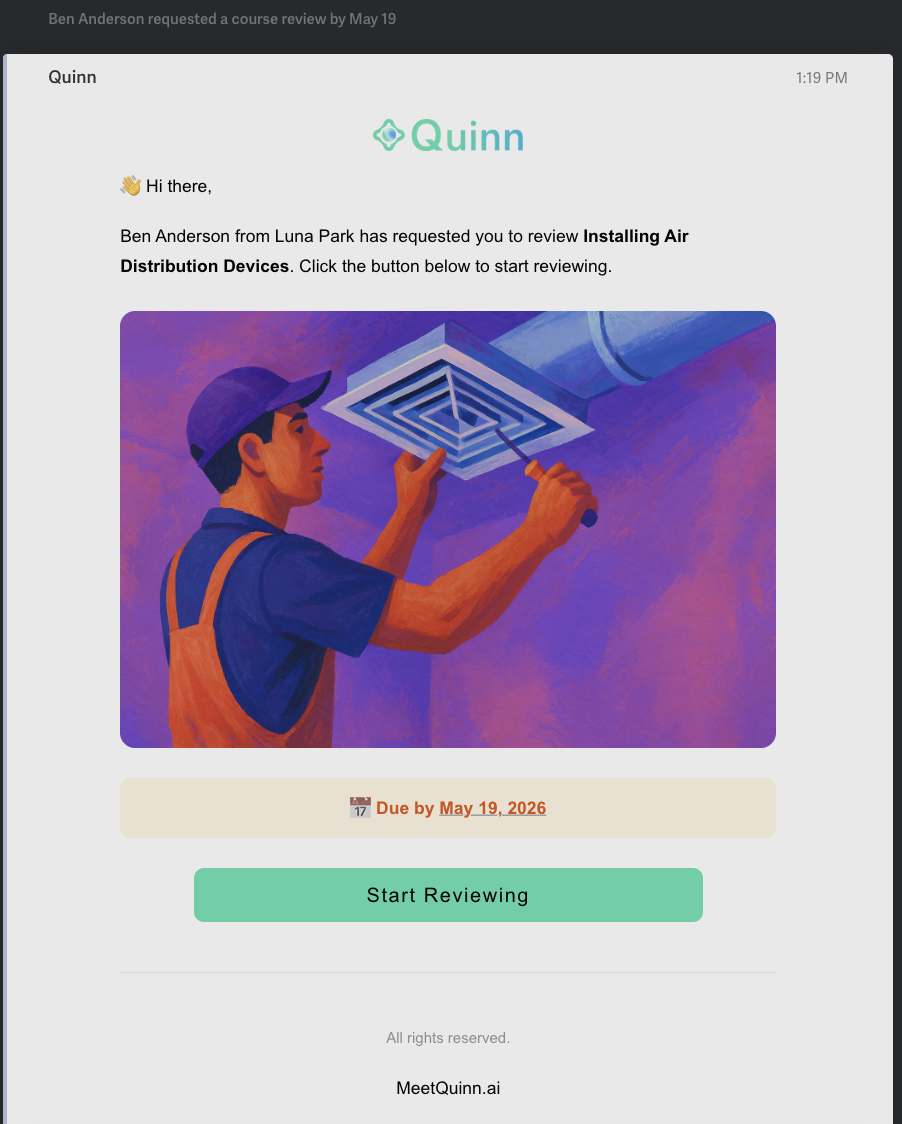
Each reviewer receives a branded email from Quinn with the course name, a Start Reviewing button, and the due date clearly displayed. Clicking the button takes them directly to the course in review mode.
Step 6: Review the Course in Review Mode
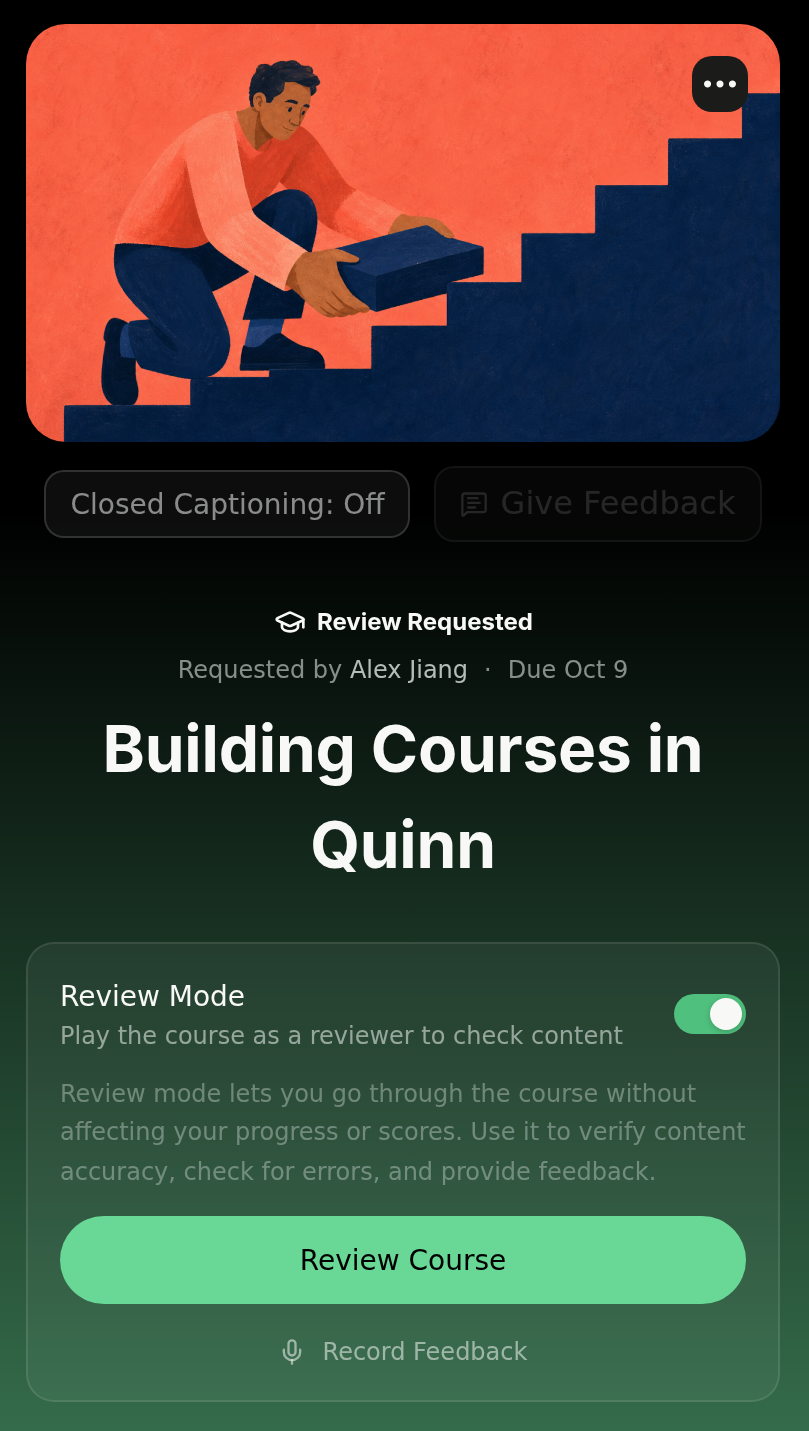
Reviewers see a Reviews Requested section in their Assigned to Me view. Clicking a review opens the course with Review Mode enabled — they can play through the content to verify accuracy, check for errors, and provide feedback without it counting toward their own training progress. When finished, they click Mark as Reviewed to complete the request (see Step 11).
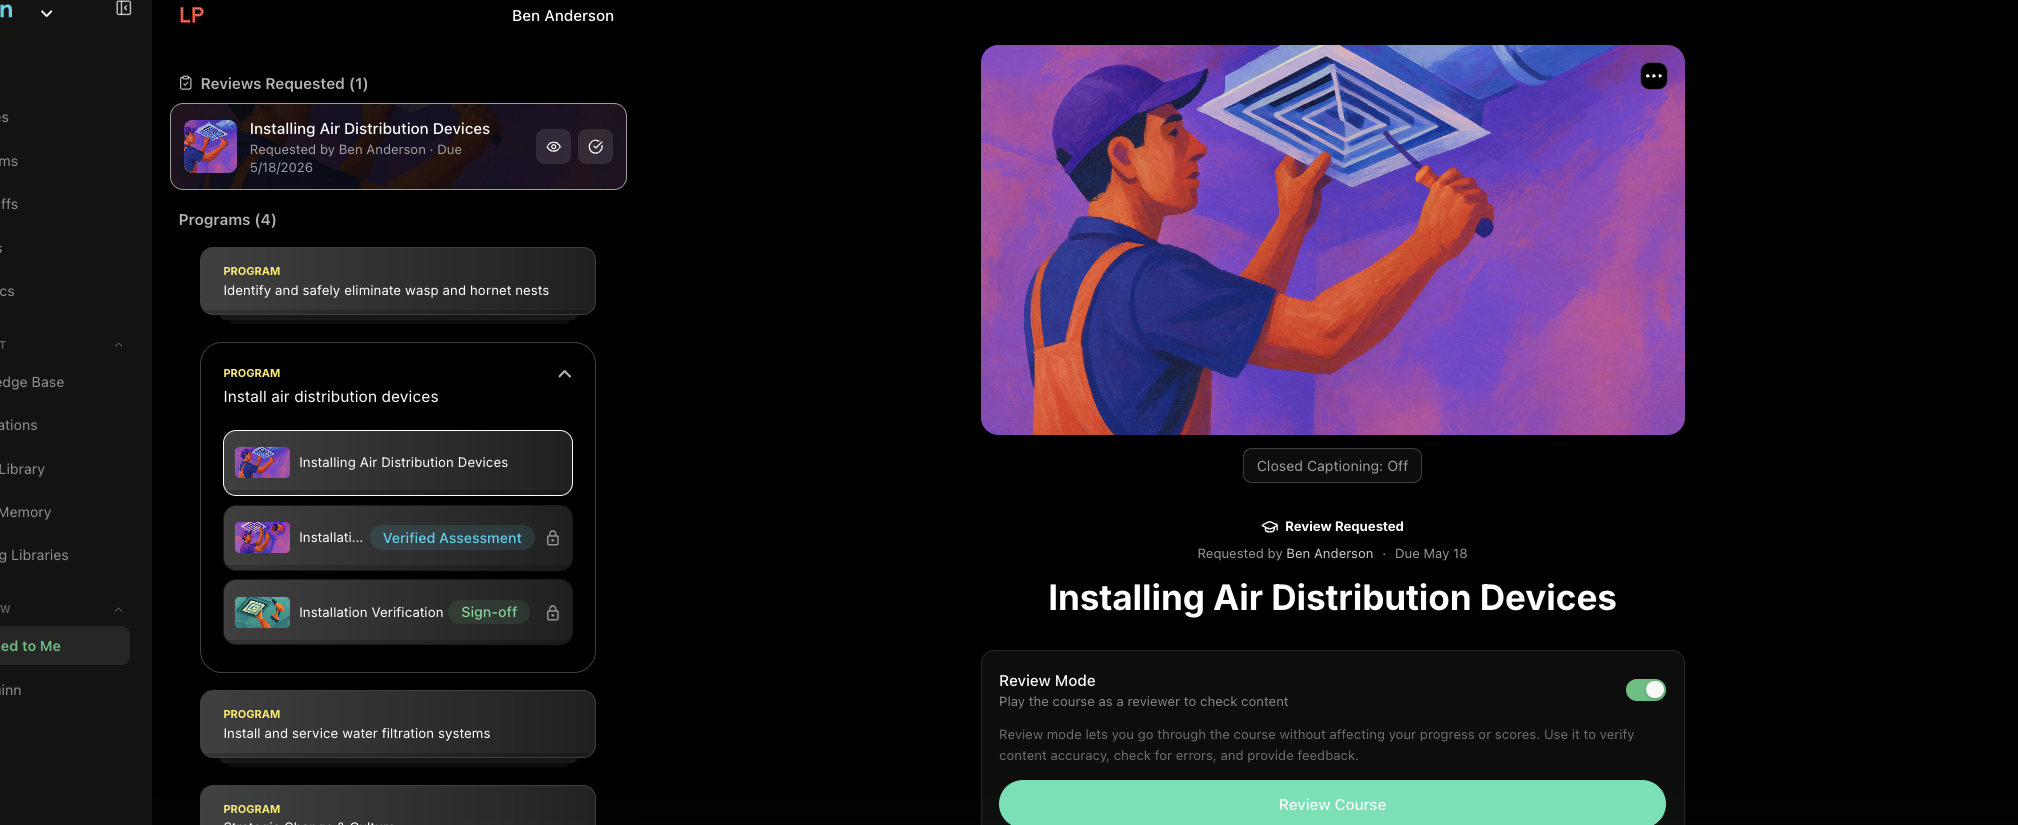
💡 Tip: Review Mode is automatically enabled for review assignments. Reviewers can toggle it off if they want, but it's on by default so their progress and scores aren't affected.
Track review requests across every course
The course detail page shows reviewers for one course. To see every review request in your organization — and assign new ones without opening each course — use the Review Requests dashboard.
Step 7: Open the Review Requests Dashboard
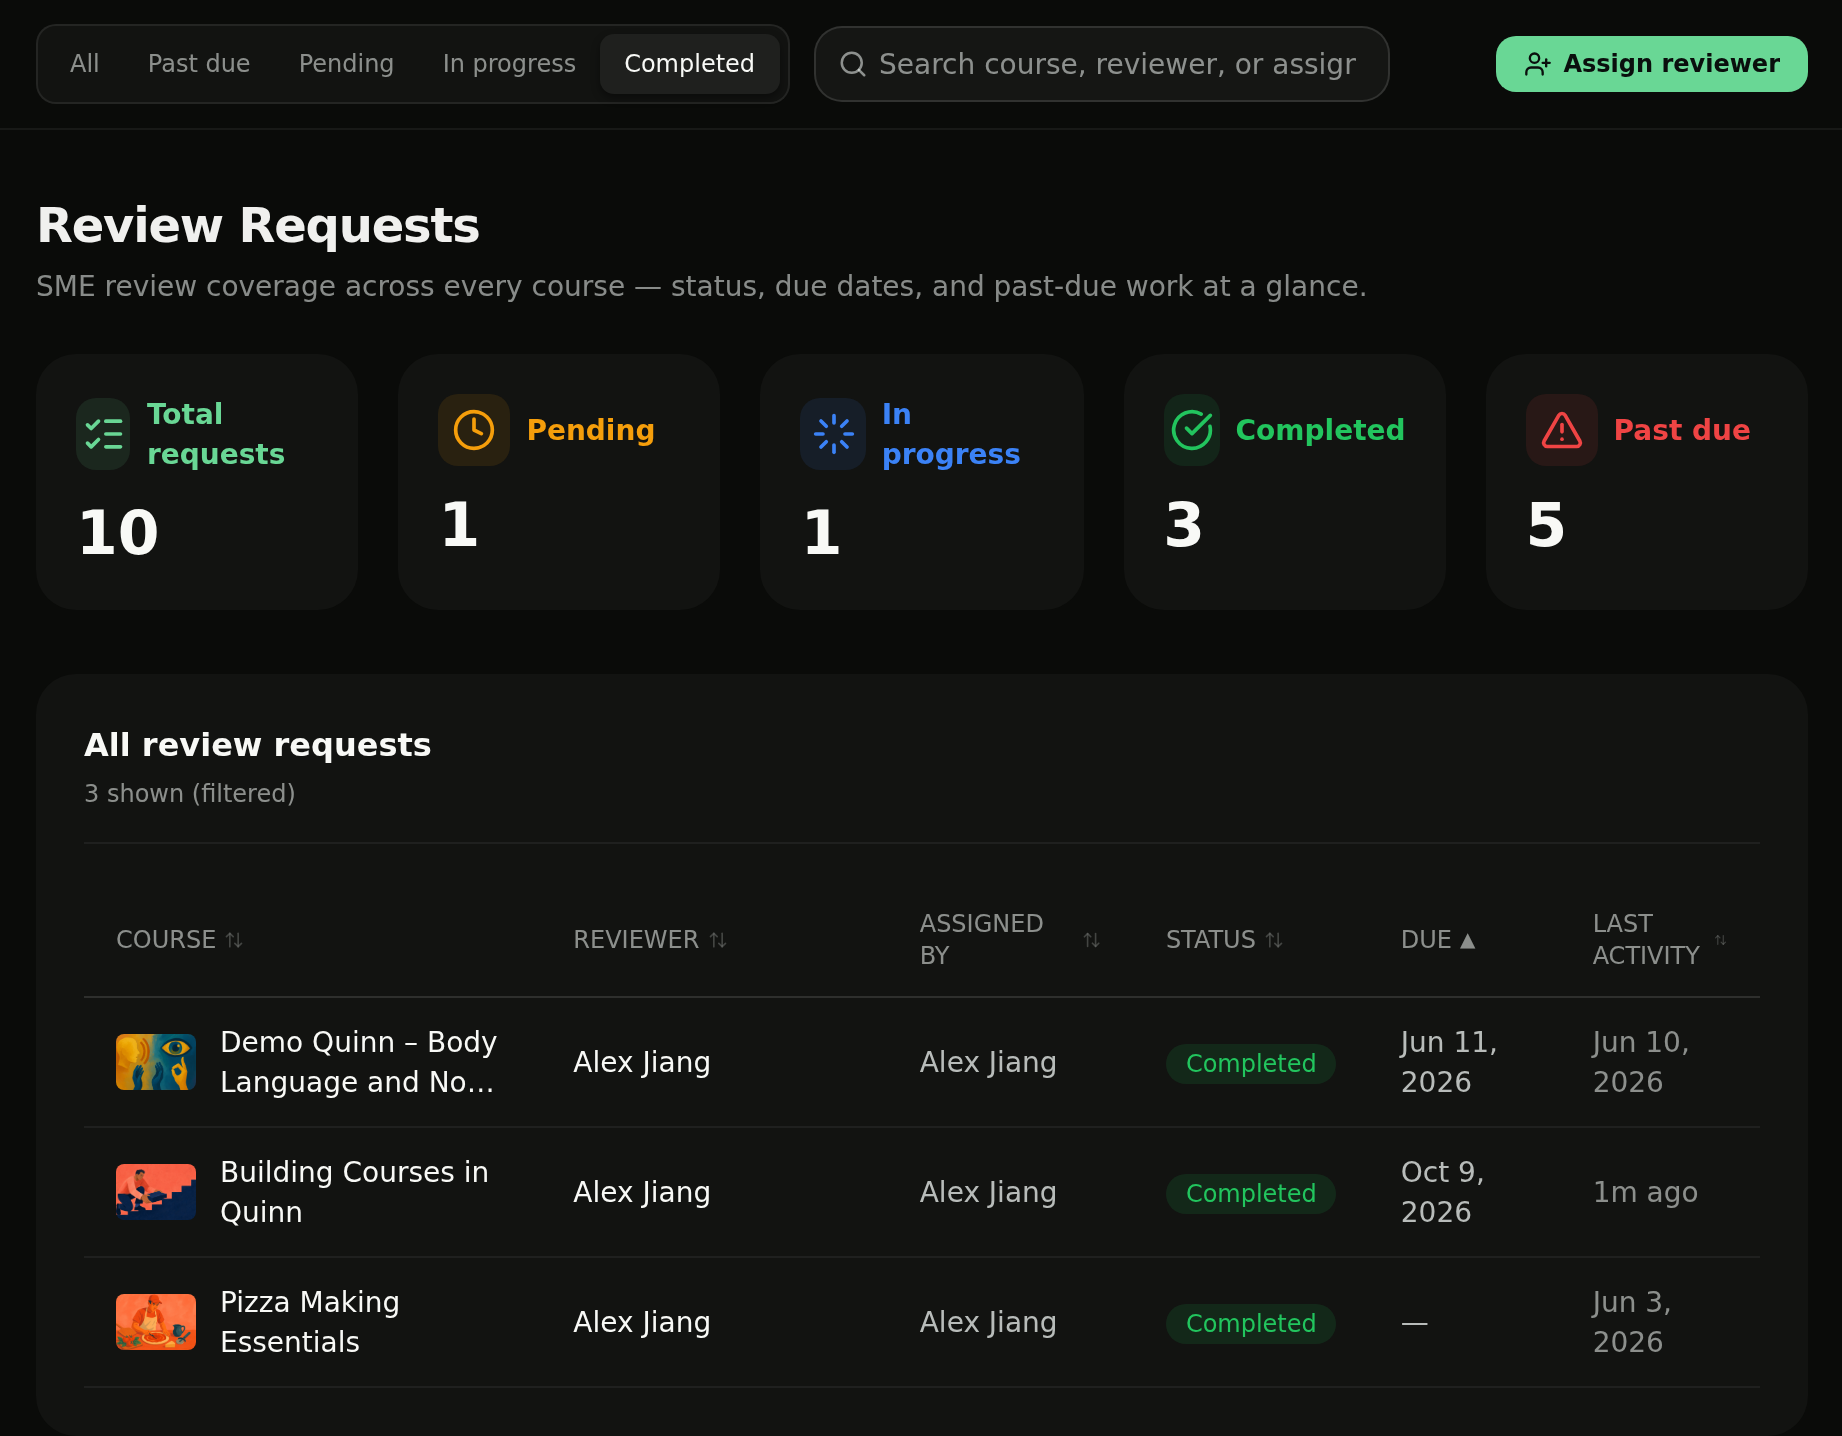
Go to Reports in the sidebar and choose Review Requests from the dashboard selector. At the top you'll see five cards — Total requests, Pending, In progress, Completed, and Past due — followed by the All review requests table listing every request with its Course, Reviewer, Assigned by, Status, Due date, and Last activity.
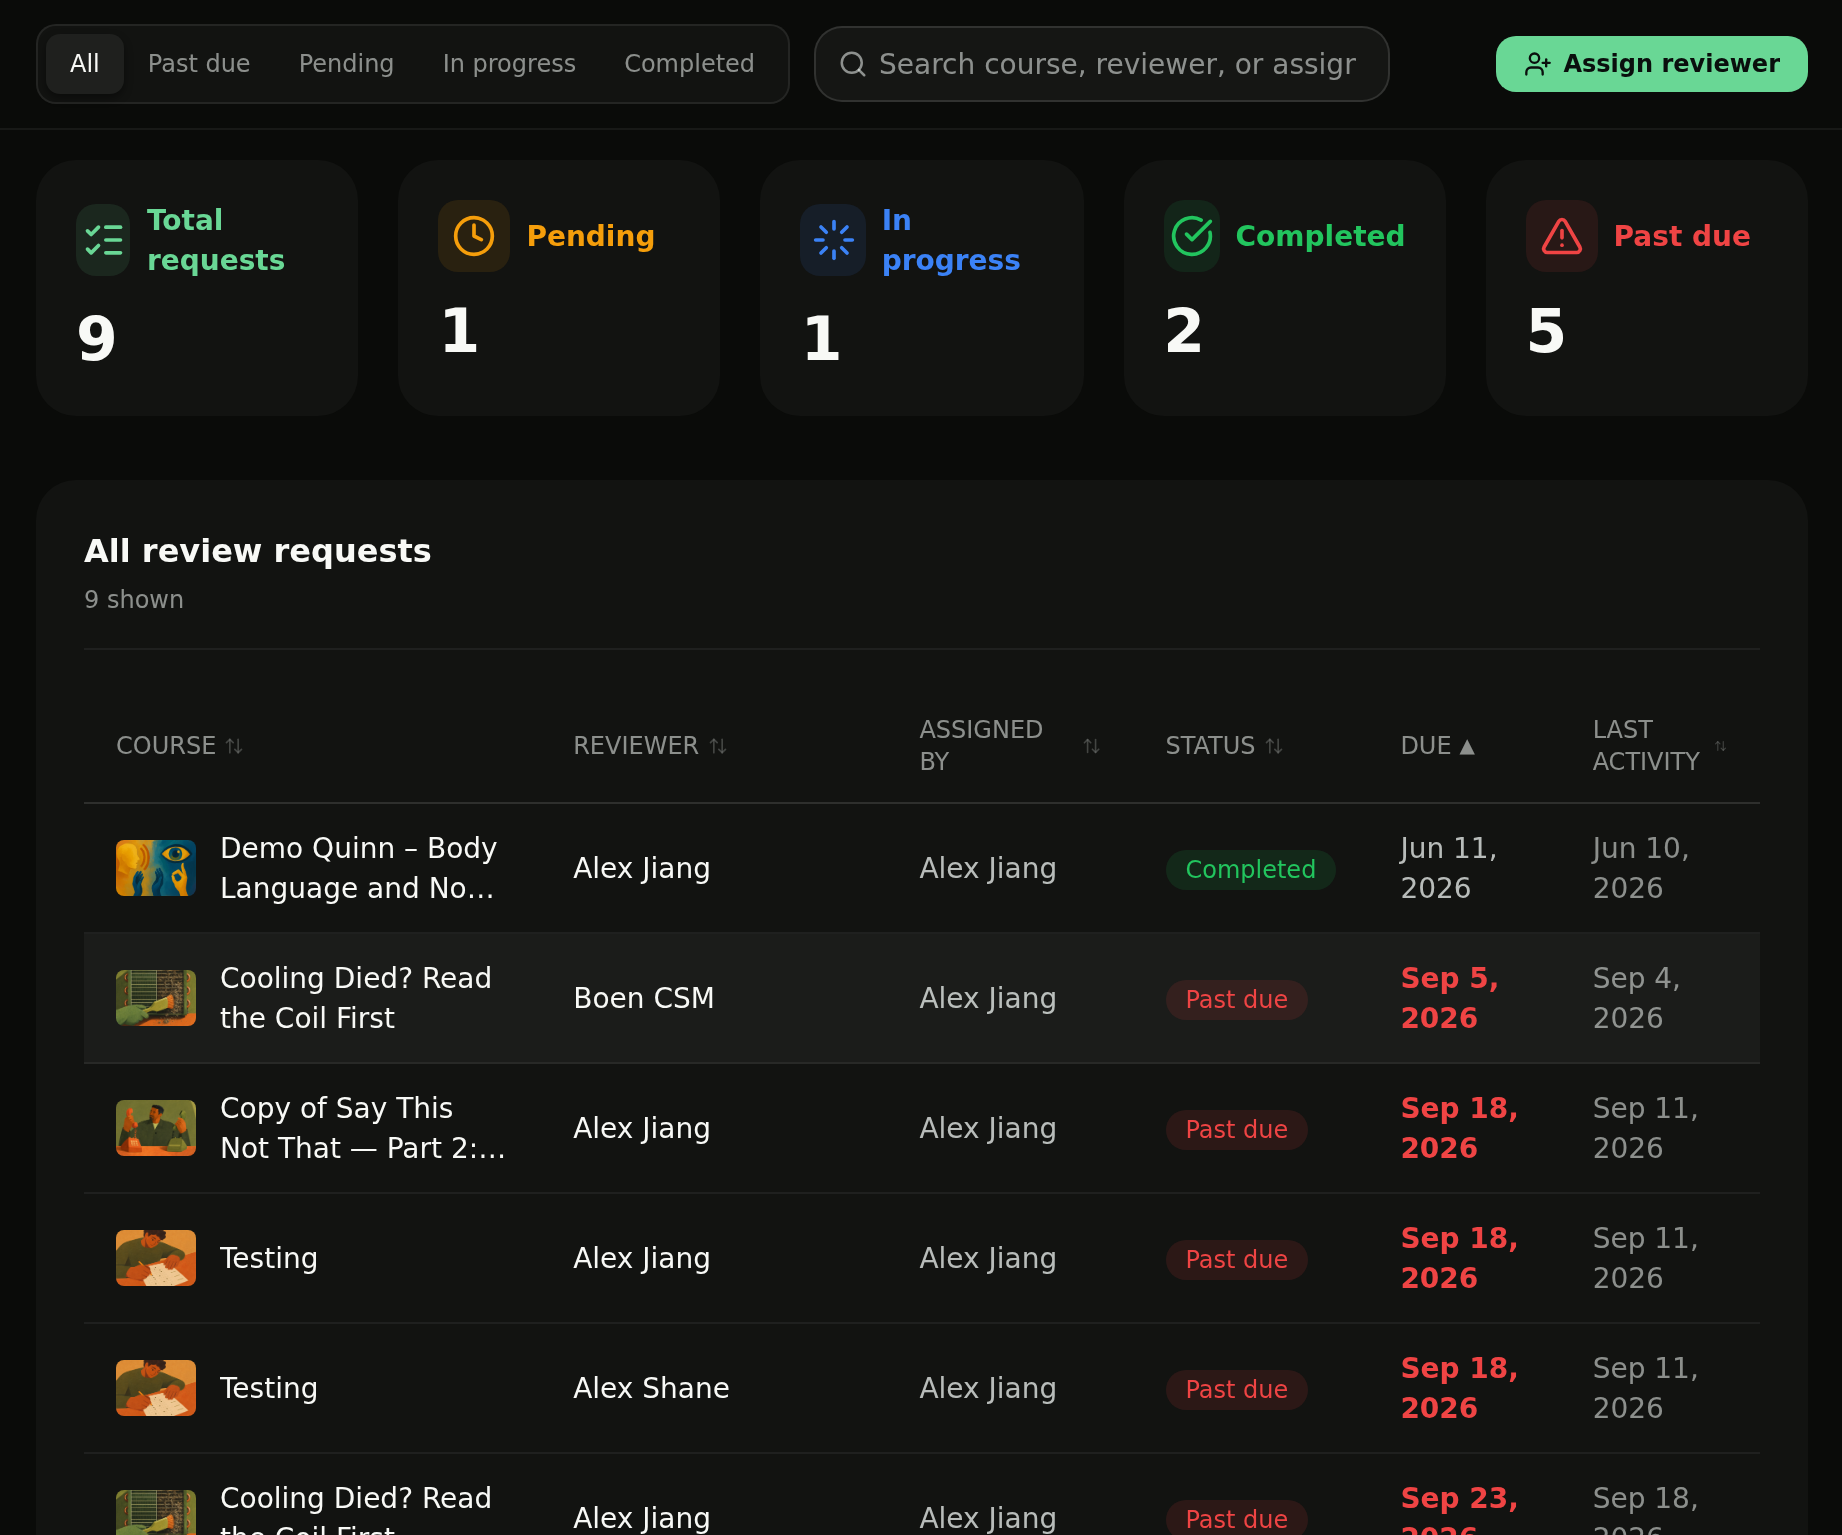
💡 Tip: Click any column header to sort. Requests whose due date has passed without being completed are highlighted in red as Past due.
Step 8: Filter and Search Requests
Use the All, Past due, Pending, In progress, and Completed filters above the table to focus on one status, or type into Search course, reviewer, or assigner… to find a specific request. The table updates instantly and shows how many requests match.
Step 9: Assign a Reviewer from the Dashboard
Click Assign reviewer in the top-right. A panel opens where you can search and tick one or more courses, then click Assign N courses. The same Request Review modal from Step 3 opens for each course so you can pick reviewers and set a due date.
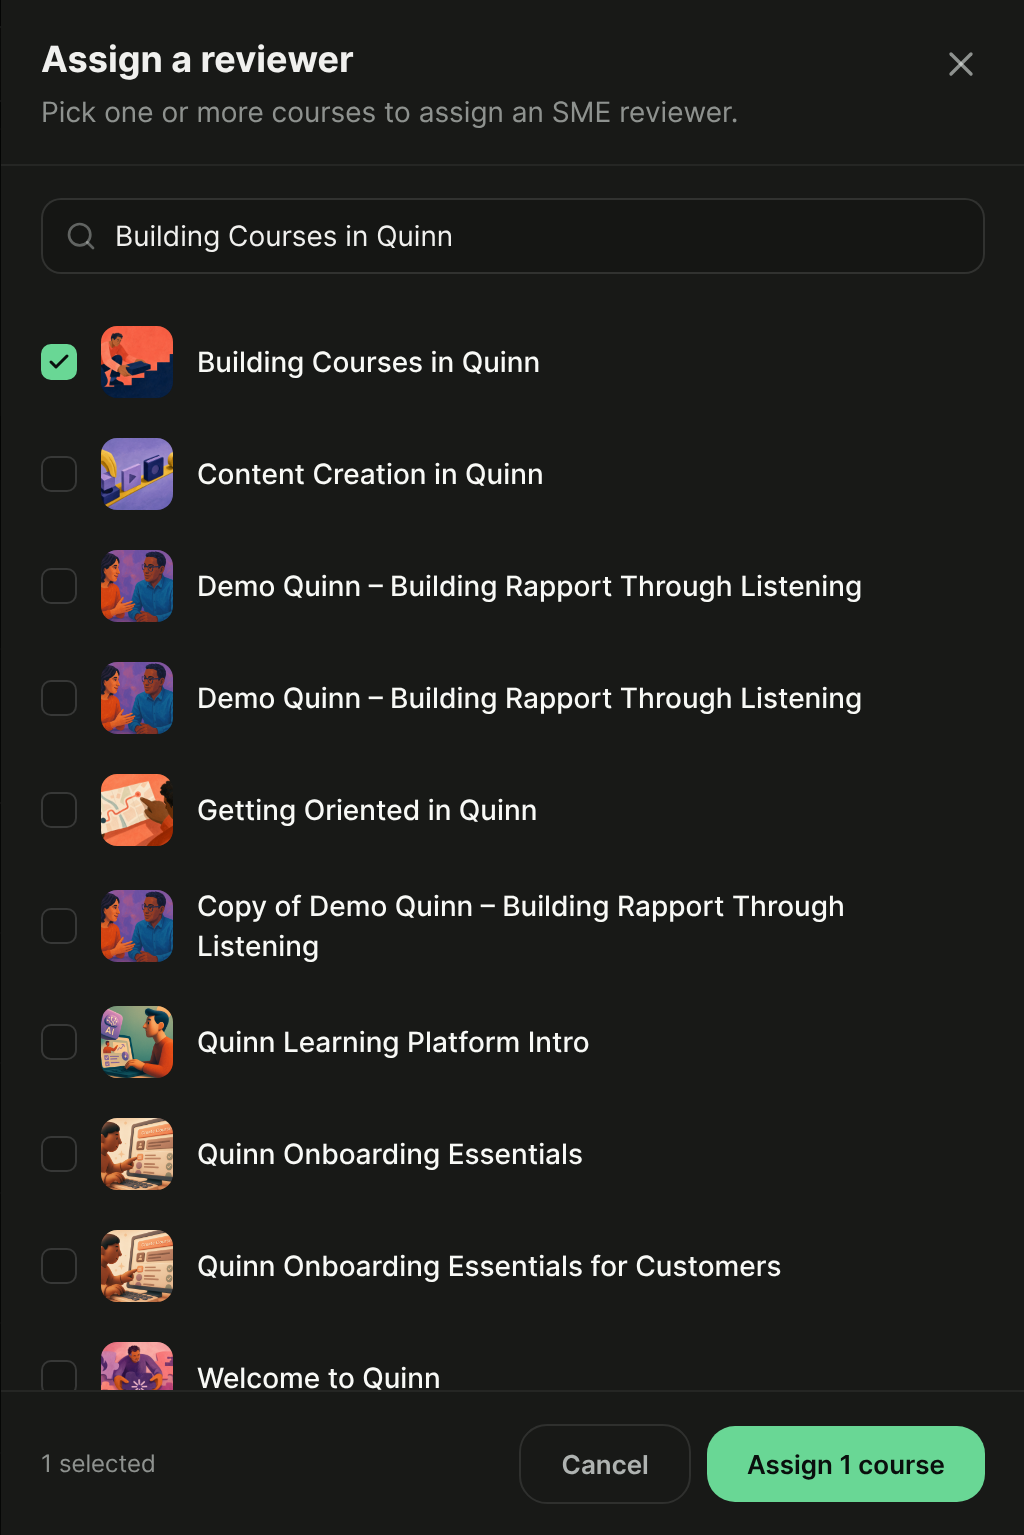
💡 Tip: Selecting several courses at once is the fastest way to send a reviewer a batch of related courses with the same due date.
How a request moves from Pending to Completed
Step 10: Reviewer Starts — Status Becomes In Progress
A new request shows as Pending. It changes to In progress automatically the moment the reviewer starts: opening the course in Review Mode, playing the first slide, or leaving their first comment. You'll see the change in both the dashboard and the course's Reviewers table, along with the Last activity time.
Step 11: Reviewer Clicks Mark as Reviewed
While playing the course in Review Mode, the reviewer sees a Mark as Reviewed button in the player's control bar — it's also offered on the end-of-course screen. Clicking it shows a Review marked as complete confirmation and sets the request to Completed.

💡 Tip: Finishing the course does not complete a review request. Reviewers can stop on any slide and click Mark as Reviewed as soon as they're satisfied — or play all the way through first. Either way, the request stays In progress until they click the button.
Step 12: Confirm Completion on the Dashboard
Back on the Review Requests dashboard, select the Completed filter. The request appears with a green Completed status and an updated Last activity time, and the Completed card count goes up.
Request a review from subject matter experts
If your members have subjects set on their profile (see Add Members), you can route a review to everyone who knows the topic instead of picking names one by one.
Step 13: Open the Subject Matter Expert Tab
In the Request Review modal — from a course's ⋯ menu, the course details page, or Assign reviewer on the Review Requests dashboard — switch to the Subject Matter Expert tab. Click Select subjects and search for a subject.

Step 14: Pick Subjects to Find Reviewers
Choose one or more subjects. The Reviewers list fills in with every active member who is an expert in those subjects, with a count of how many will be asked. Optionally check Set due date, then click Request Review to send the request to all of them.

💡 Tip: Request Review stays disabled until at least one expert is found. If no one has that subject yet, add it to a member's profile first.
Step 15: Remove or Restore an Expert
Click the × next to anyone you don't want to include. The count updates and a Restore 1 removed link appears so you can bring them back before sending.

💡 Tips
Review assignments are separate from training assignments — assigning someone as a reviewer does not add the course to their training workload.
You can assign the same person as both a learner and a reviewer on the same course — their review progress and training progress are tracked independently.
Subject-matter reviewers are tracked exactly like any other reviewer — they appear in the course's Reviewers table and on the dashboard with Pending, In progress, and Completed status.
Use the Past due filter on the Review Requests dashboard for a quick list of reviewers who need a nudge.
To automate follow-up for unstarted reviews, check out Automations to set up reminder workflows that nudge reviewers who haven't started after a configurable time.