Mention Media Library Assets in the Course Creator
📌 Overview
You can bring approved images, videos, and other files from your organization's Media Library directly into a course request. Mentioning an asset gives Quinn the exact source material to use without downloading and re-uploading the file.
Step 1: Open Add and Settings
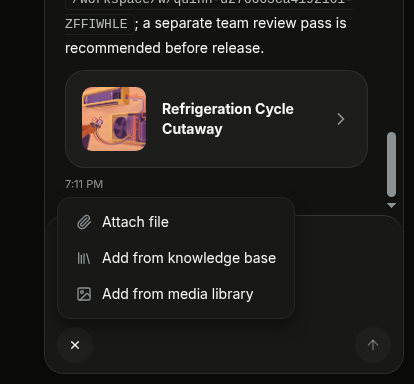
In the course creator, select Add and settings beside the message box. The menu shows the sources you can attach to your request.
Step 2: Choose Media Library
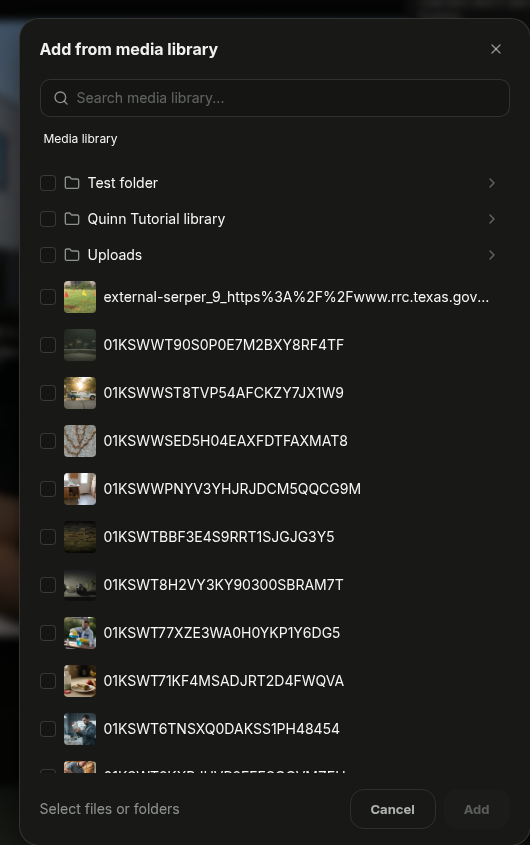
Select Add from media library. The picker opens with your organization's media folders and files.
Step 3: Find the Asset
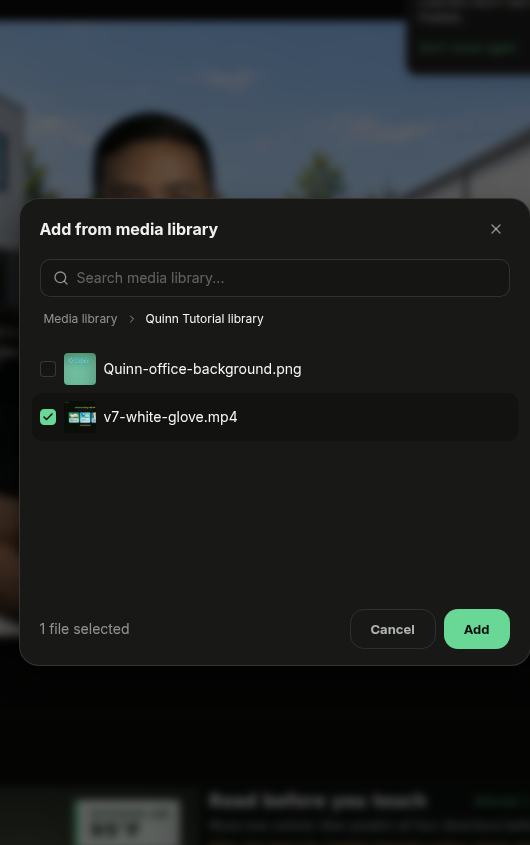
Open a folder to browse its contents, or use Search media library... to find a file by name. Select the folder or asset you want to inspect.
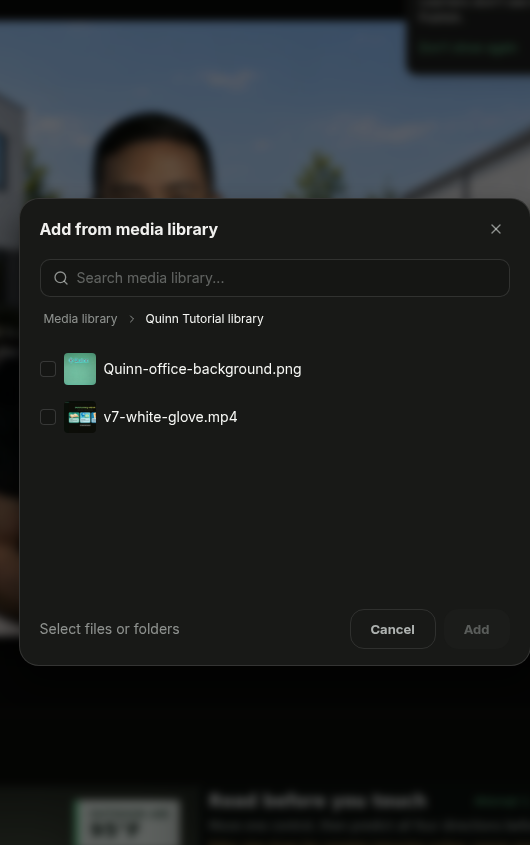
💡 Tip: Organize frequently reused assets into clearly named folders in the Media Library so they are faster to find while editing.
Step 4: Select the File
Select the file you want Quinn to use. Confirm the selection count at the bottom of the picker, then select Add.
Step 5: Send Your Request
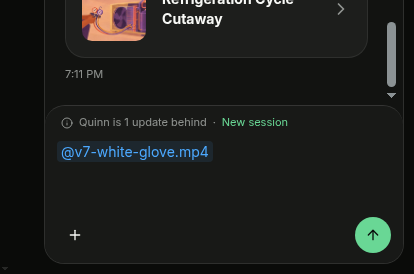
The file appears in the composer as an @mention. Add instructions explaining how Quinn should use the asset, then send your request.