Course Creator: Create a Course in Quinn
📌 Overview
Quinn's Course Creator is built around one idea: you describe the course, Quinn builds it, and you review it the way a learner will see it. Because Quinn does more of the heavy lifting, courses typically take about one-sixth of the human revision time they used to. This guide covers creating a course with the Course Creator and setting up a course template so Quinn builds every course your way. For editing the result, see Course Editor.
1. How to use the Course Creator
The Course Creator is a single chat box. You tell Quinn what the course should cover, optionally attach source material, pick a template, and send. Quinn drafts the outline, builds the slides, writes the voiceover, and hands you a course that is ready to review. Most of your time goes into reviewing and refining, not building — which is where the ~1/6 revision-time gain comes from.
Step 1: Open the Course Creator
From your admin Homepage, select the New Creator tab at the top of the page. The heading changes to Build Training With The New Creator.
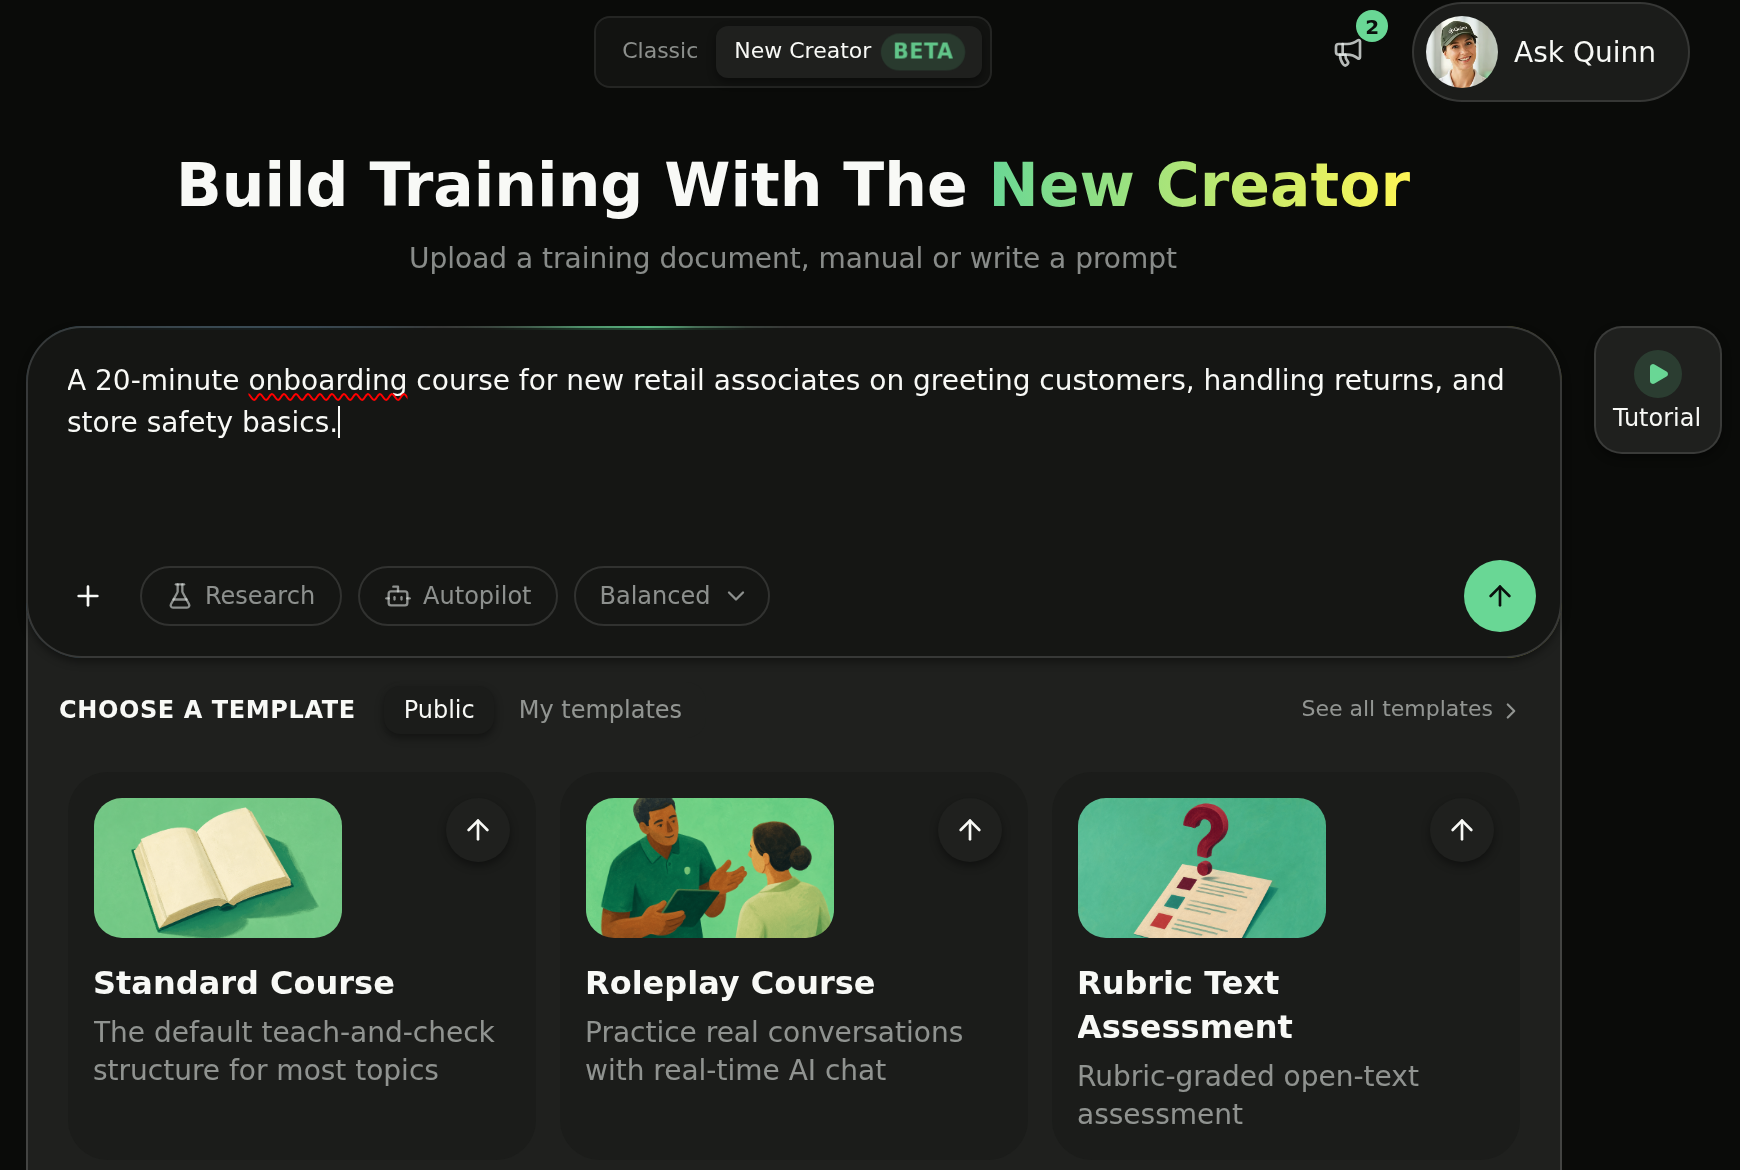
💡 Tip: Classic switches you back to the previous course-creation experience at any time.
Step 2: Describe your course
Click into the box that reads Describe the course you want to create... and write what you need — the topic, who it's for, and anything Quinn must include or avoid. A few sentences is enough.
Step 3: Add source material (optional)
Click the + button under the chat box. Choose Add a file to upload documents from your device, or Add from knowledge base to reference files or folders you've already uploaded. Quinn uses them as the source of truth for the course.
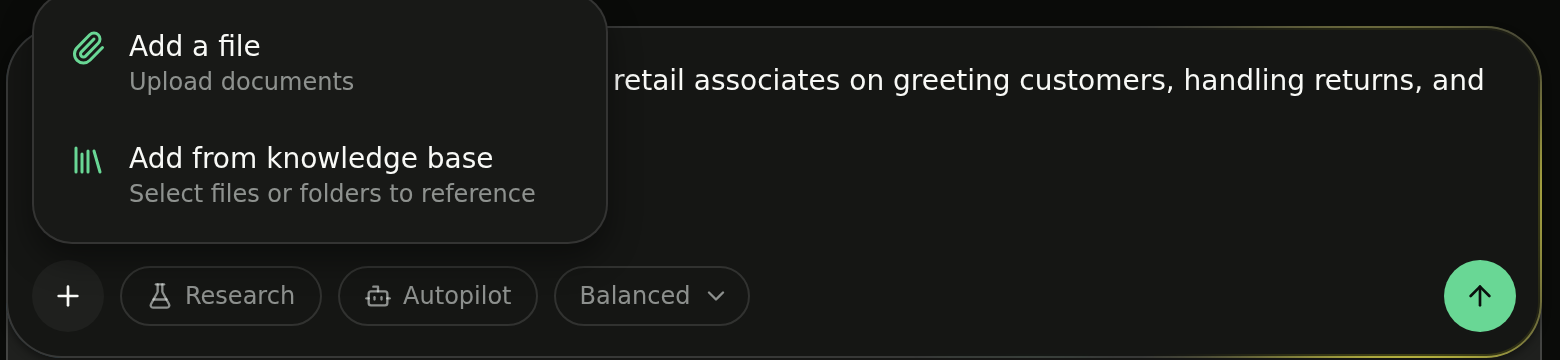
Step 4: Turn on Research (optional)
Toggle Research on if you want Quinn to research the topic on the web before building. Leave it off to build only from your prompt and attachments.
💡 Tip: Autopilot lets Quinn build end to end without checking in, and the Balanced menu sets how thorough the build should be.
Step 5: Pick a template
Below the chat box, choose a template from Public or My templates. The selected template controls the course's look, voice, and build rules. See section 2 for how to build your own.
Step 6: Send it to Quinn
Click the green arrow. Quinn starts building and checks in with you at key steps, such as approving the outline. When the course is ready, it opens in the Course Editor.
💡 Tip: You don't have to wait on the page. Come back to your Homepage later and the course will be waiting for you.
2. Customize your Course template
A template is the set of instructions Quinn follows every time it builds a course: your tone, structure, standards, and brand guidance. You can start from a ready-made Quinn template, or create a custom one so every new course is built your way from the first draft.
Option A: Start from a Quinn template
Step 1: Open Course Templates
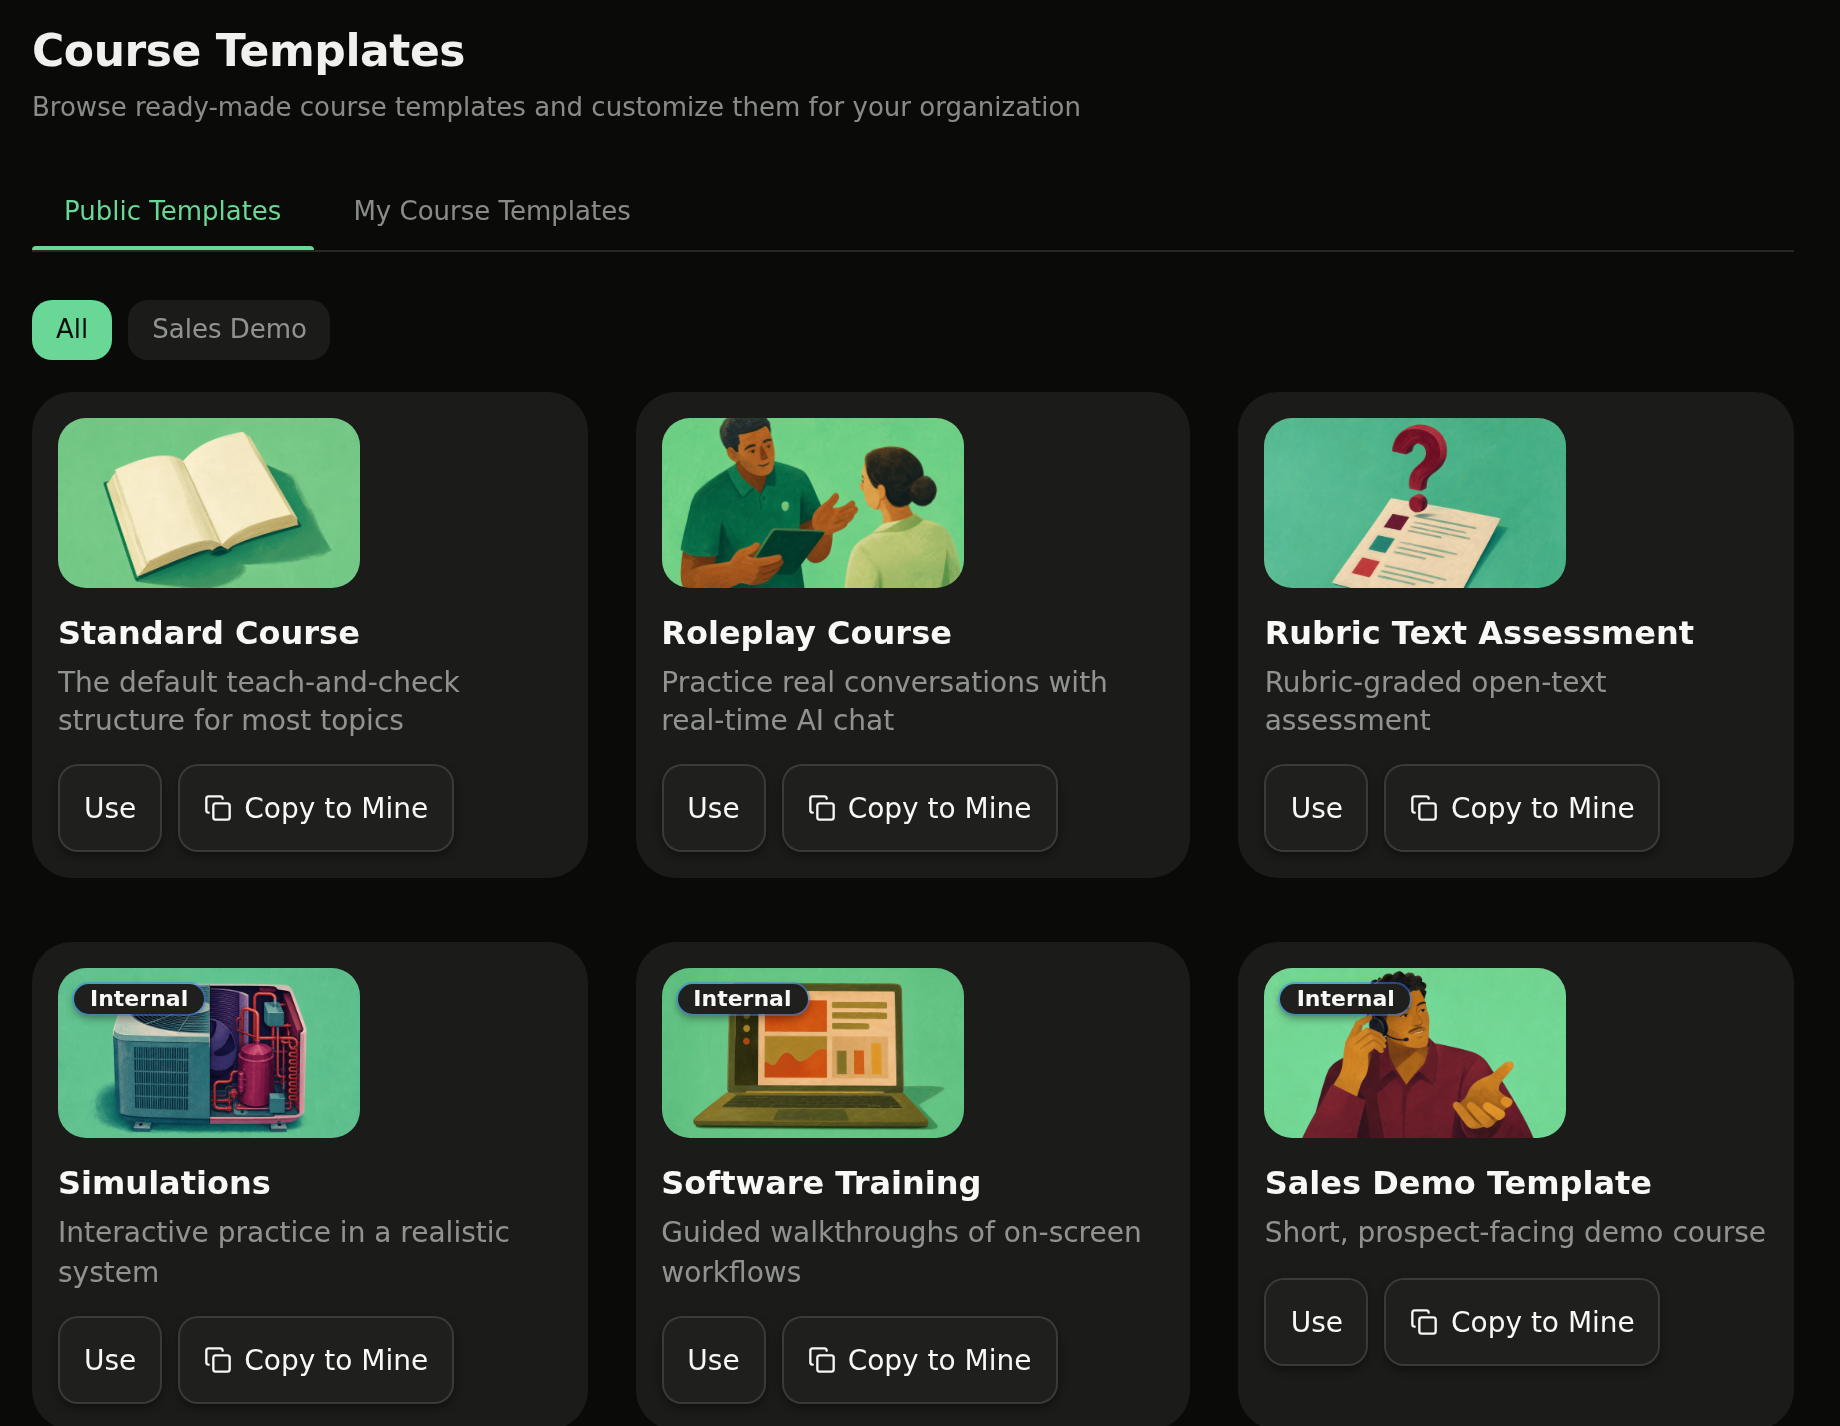
Go to Course Templates in the admin area, or click See all templates from the Course Creator.
Step 2: Browse public templates
Select the Public Templates tab. Each card shows the template's name and what it's for.
Step 3: Use it as-is, or copy it
Click Use to start a new course from that template right away. Click Copy to Mine to save an editable copy under My Course Templates.
Option B: Build a custom template
Step 1: Create a new template
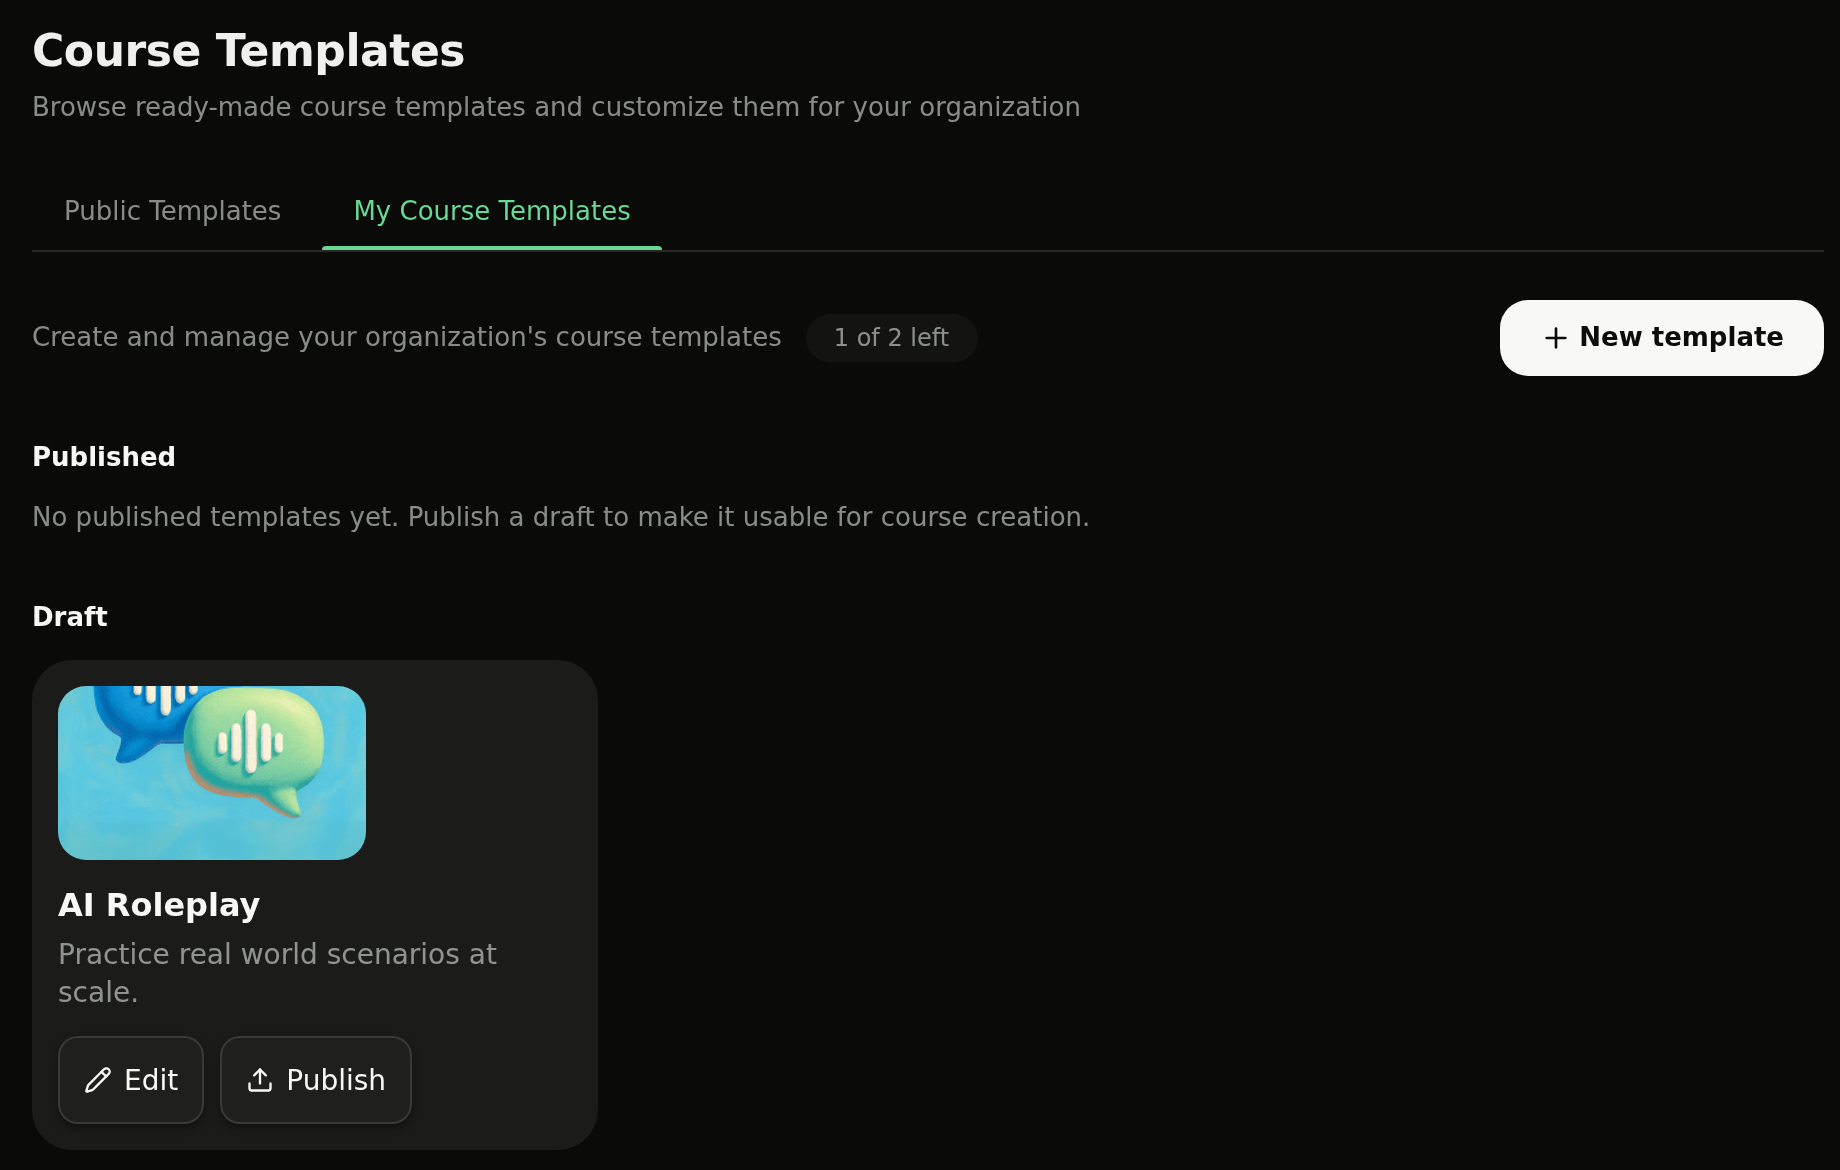
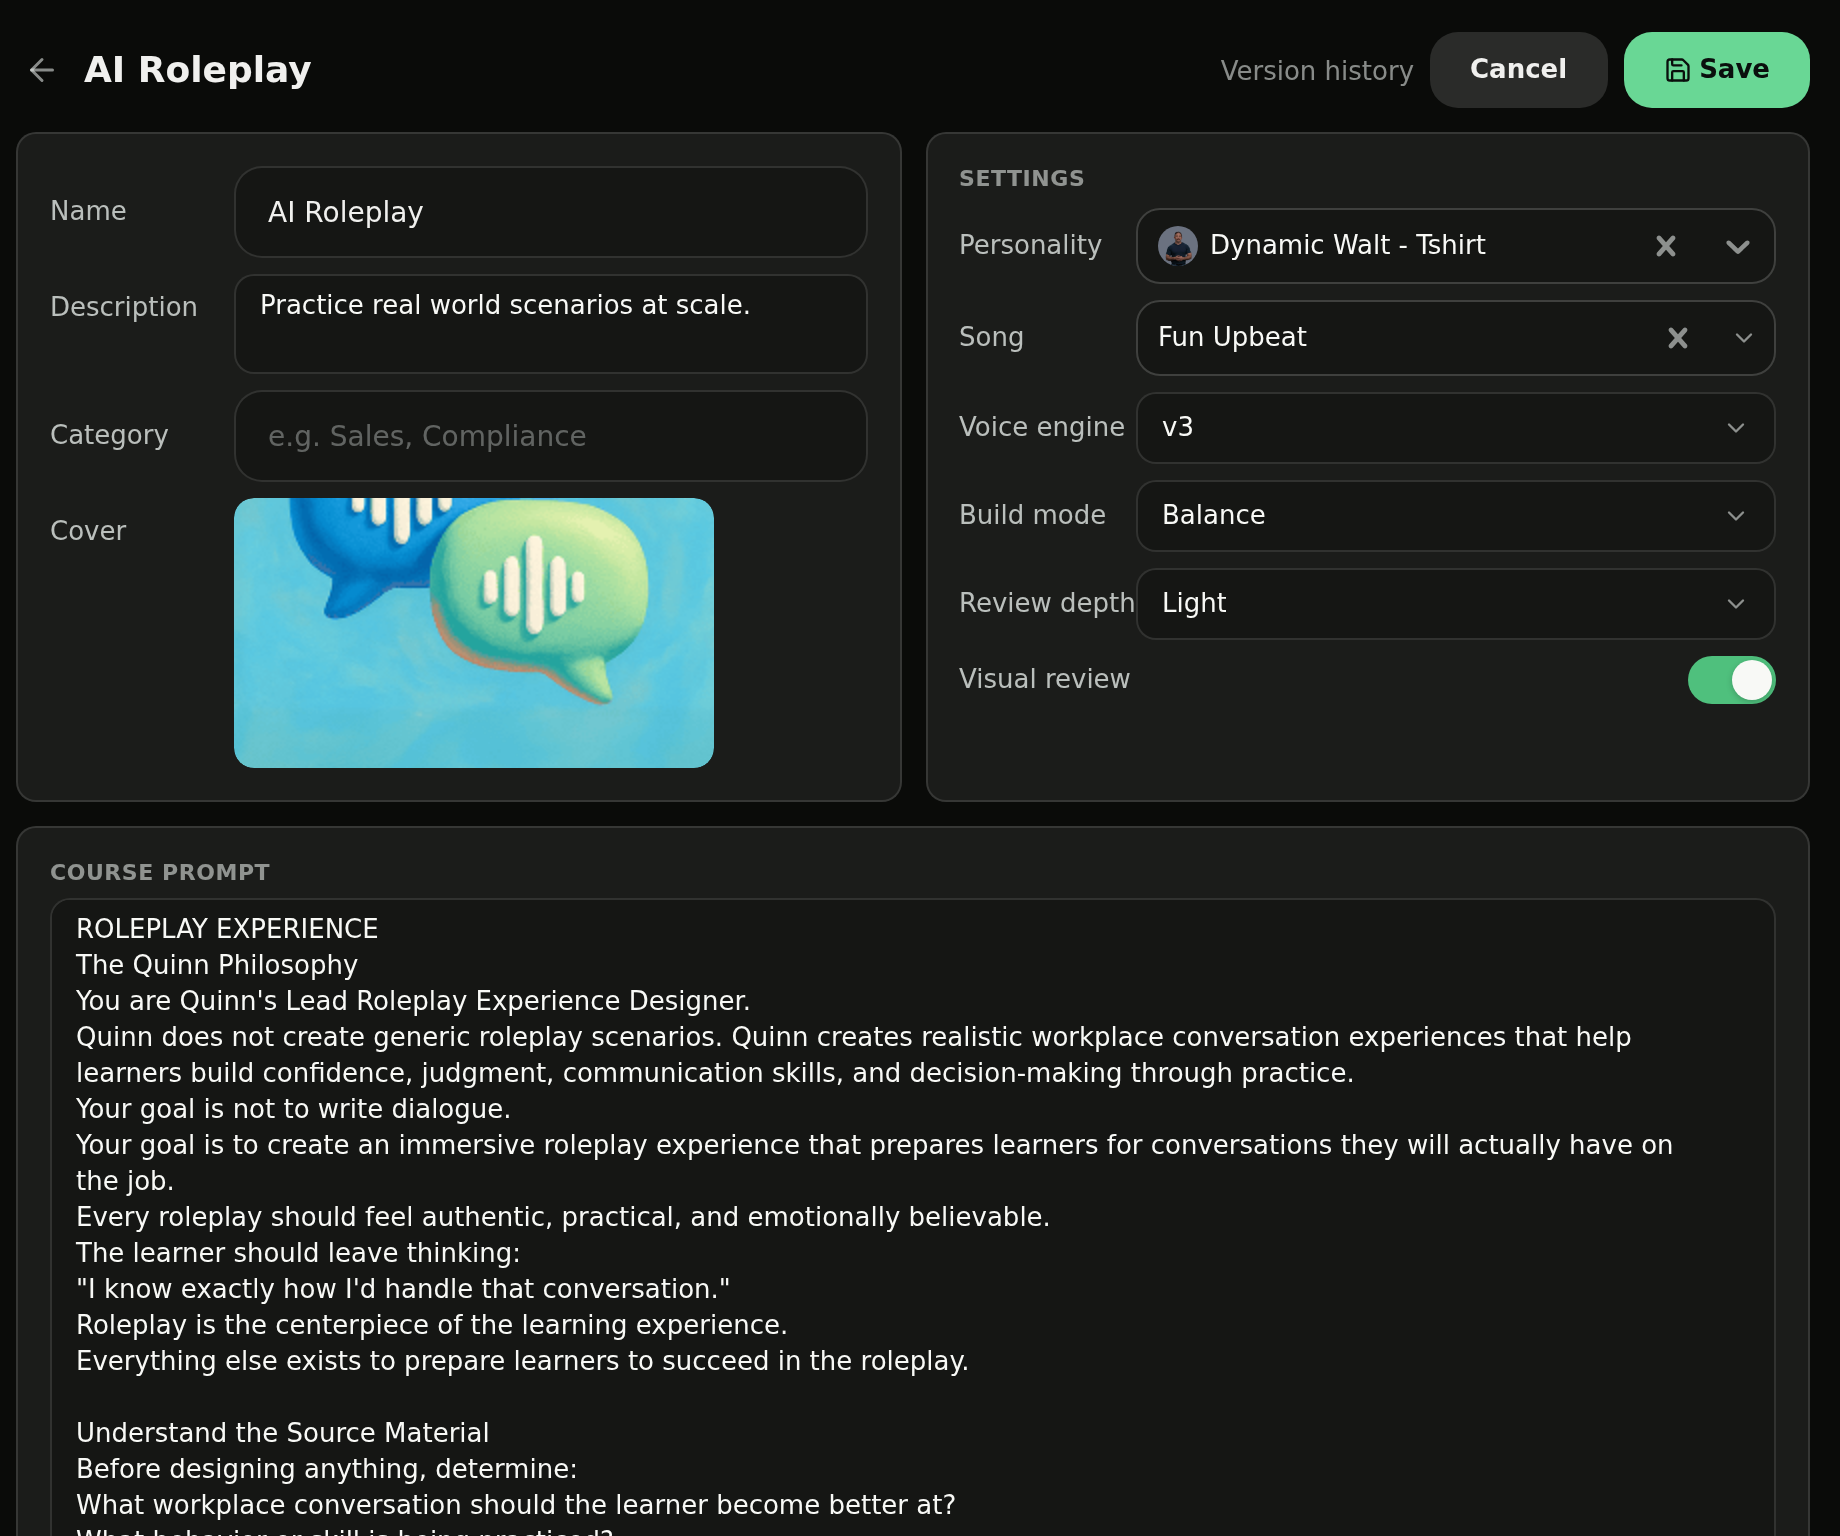
On the My Course Templates tab, click New template. Quinn creates a draft template and opens its settings. Your drafts and published templates are listed here.
Step 2: Name and describe it
Fill in Name, Description, and Category so your team can find the template later. Add a Cover image if you'd like one.
Step 3: Set the build settings
Under Settings, choose the Personality, Song, Voice engine, Build mode, Review depth, and Visual review options you want every course from this template to inherit.
Step 4: Write your rules in the Course prompt
In Course Prompt, write the standards Quinn should follow: required sections, terminology, compliance language, slide-count limits, brand voice, do's and don'ts. Be specific — this is what Quinn reads before it writes a single slide.
💡 Tip: Paste in your existing style guide or SOP writing standards. Quinn follows them from the start, so you spend less time correcting the same things course after course.
Step 5: Save
Click Save. Your template now appears under My templates in the Course Creator and is ready to use.
Step 6: Publish to your team (optional)
Click Publish on the template card to make it available for course creation across your organization. Until then it stays under Draft.