Course Editor: Edit Content and Images, Leave Comments, and Use the AI Editor
📌 Overview
The Course Editor is where you edit a course after Quinn builds it with the Course Creator. Edit mode lets you change slide text, images, questions, and the voiceover yourself. Comment mode is the AI editor: point at anything on a slide and tell Quinn what to change. Preview lets you experience the course as a learner and leave comments as you go. Because Quinn does the heavy lifting, courses typically take about one-sixth of the human revision time they used to.
1. Leave comments in Preview mode
Preview lets you experience a course exactly as a learner will — slide by slide, with narration — and drop lightweight comments as you go. It's the fastest way to do a first pass on a fresh course.
Step 1: Open Preview
From the Course Editor, click the play button in the top navigation. The course opens in the learner player with a Comments panel beside it.

Step 2: Play through the course
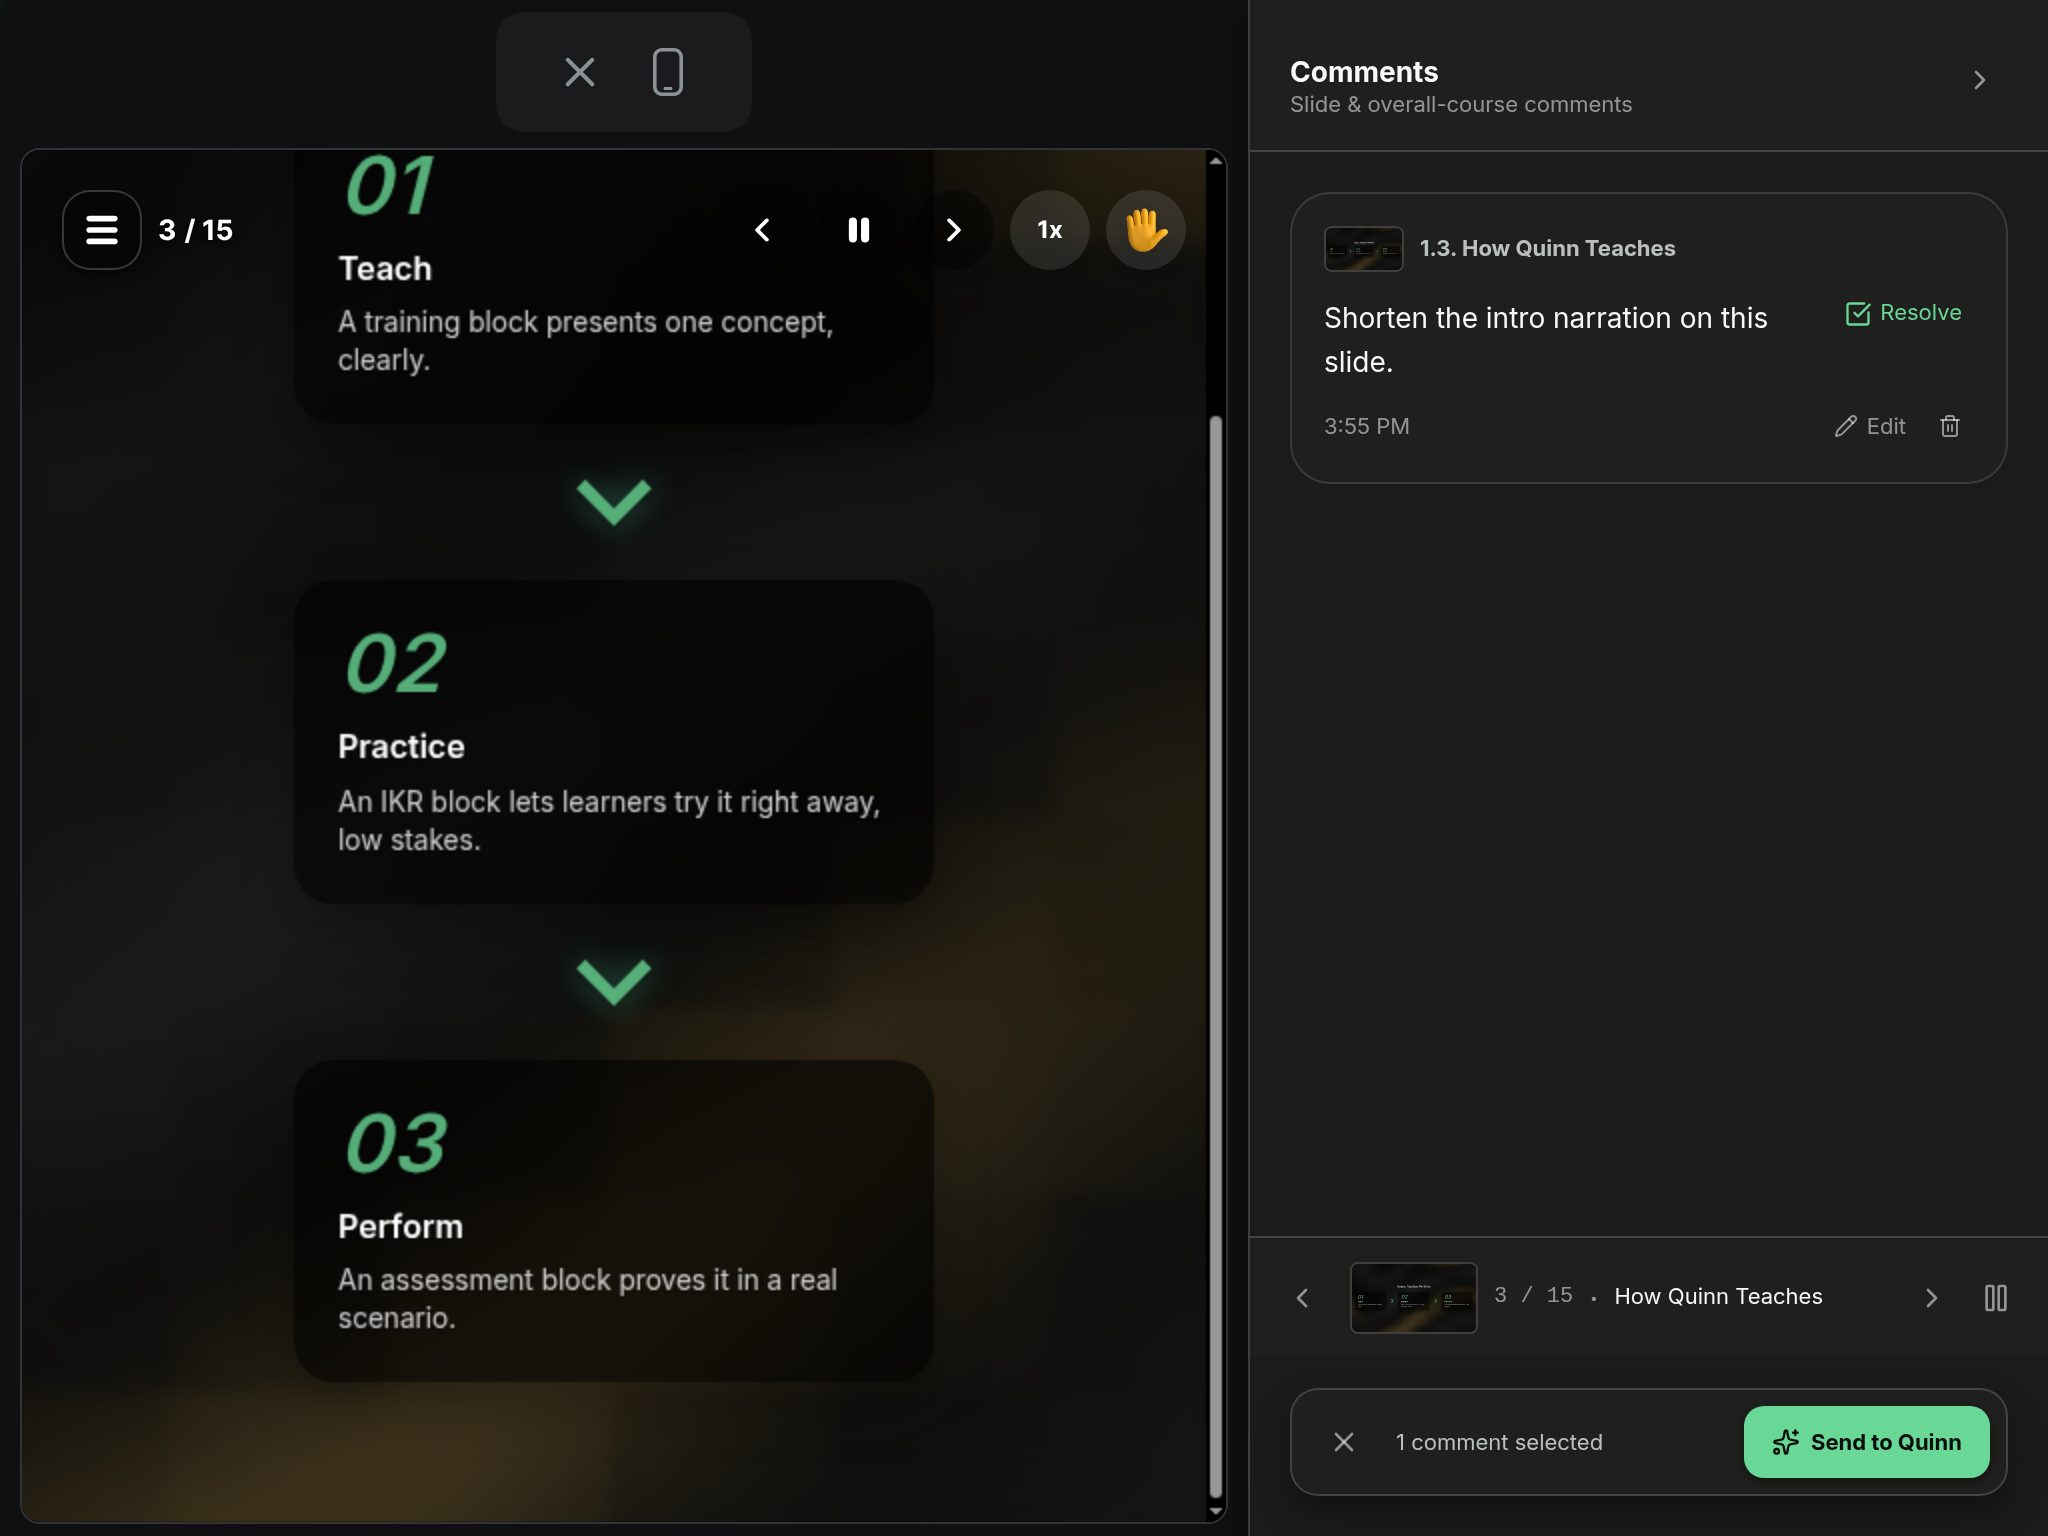
Use the arrows in the player to move between slides, and the pause button to stop the narration. The slide counter at the top tells you where you are, for example 2 / 15.
Step 3: Comment as you go
On any slide, type into Comment on this slide… and press Enter. The comment is saved to the slide you're on and appears in the panel with a slide thumbnail.
💡 Tip: Before the first slide, the box reads Add an overall comment on this course…. Use it for course-wide feedback like "shorten every module" or "make the tone more casual."
Step 4: Review your comments
Your comments collect in the Comments panel. Use Edit to reword one, or the trash icon to delete it.
Step 5: Send comments to Quinn
Tick Resolve on each comment you want Quinn to act on. A bar at the bottom shows how many are selected. Click Send to Quinn and Quinn starts revising the course based on your feedback.
Step 6: Return to the editor
Close Preview to go back to the Course Editor. Any comments you didn't send are waiting for you in Comments mode there.
2. Use the AI editor or edit it yourself
The Course Editor has three modes in the pill at the top of the screen: Browse, Comments, and Edit. Browse is for moving around the course. Comment mode is for telling Quinn what to change. Edit mode is for changing things yourself. Together with Preview, they form one review loop: see the learner experience, ask Quinn for revisions, or make precise edits — all without leaving the editor.
When to use which
- Use Comment mode when you know what's wrong but want Quinn to do the work: "make this heading shorter," "swap this image for a photo of a technician," "slow down the voiceover here."
- Use Edit mode when you know exactly what the result should be and it's faster to type it yourself: fixing a product name, rewording one sentence, correcting a number.
Comment mode: the AI editor
Step 1: Switch to Comments
Click Comments in the mode pill at the top of the editor. The count next to it shows how many comments are open.
Step 2: Click anywhere on the slide
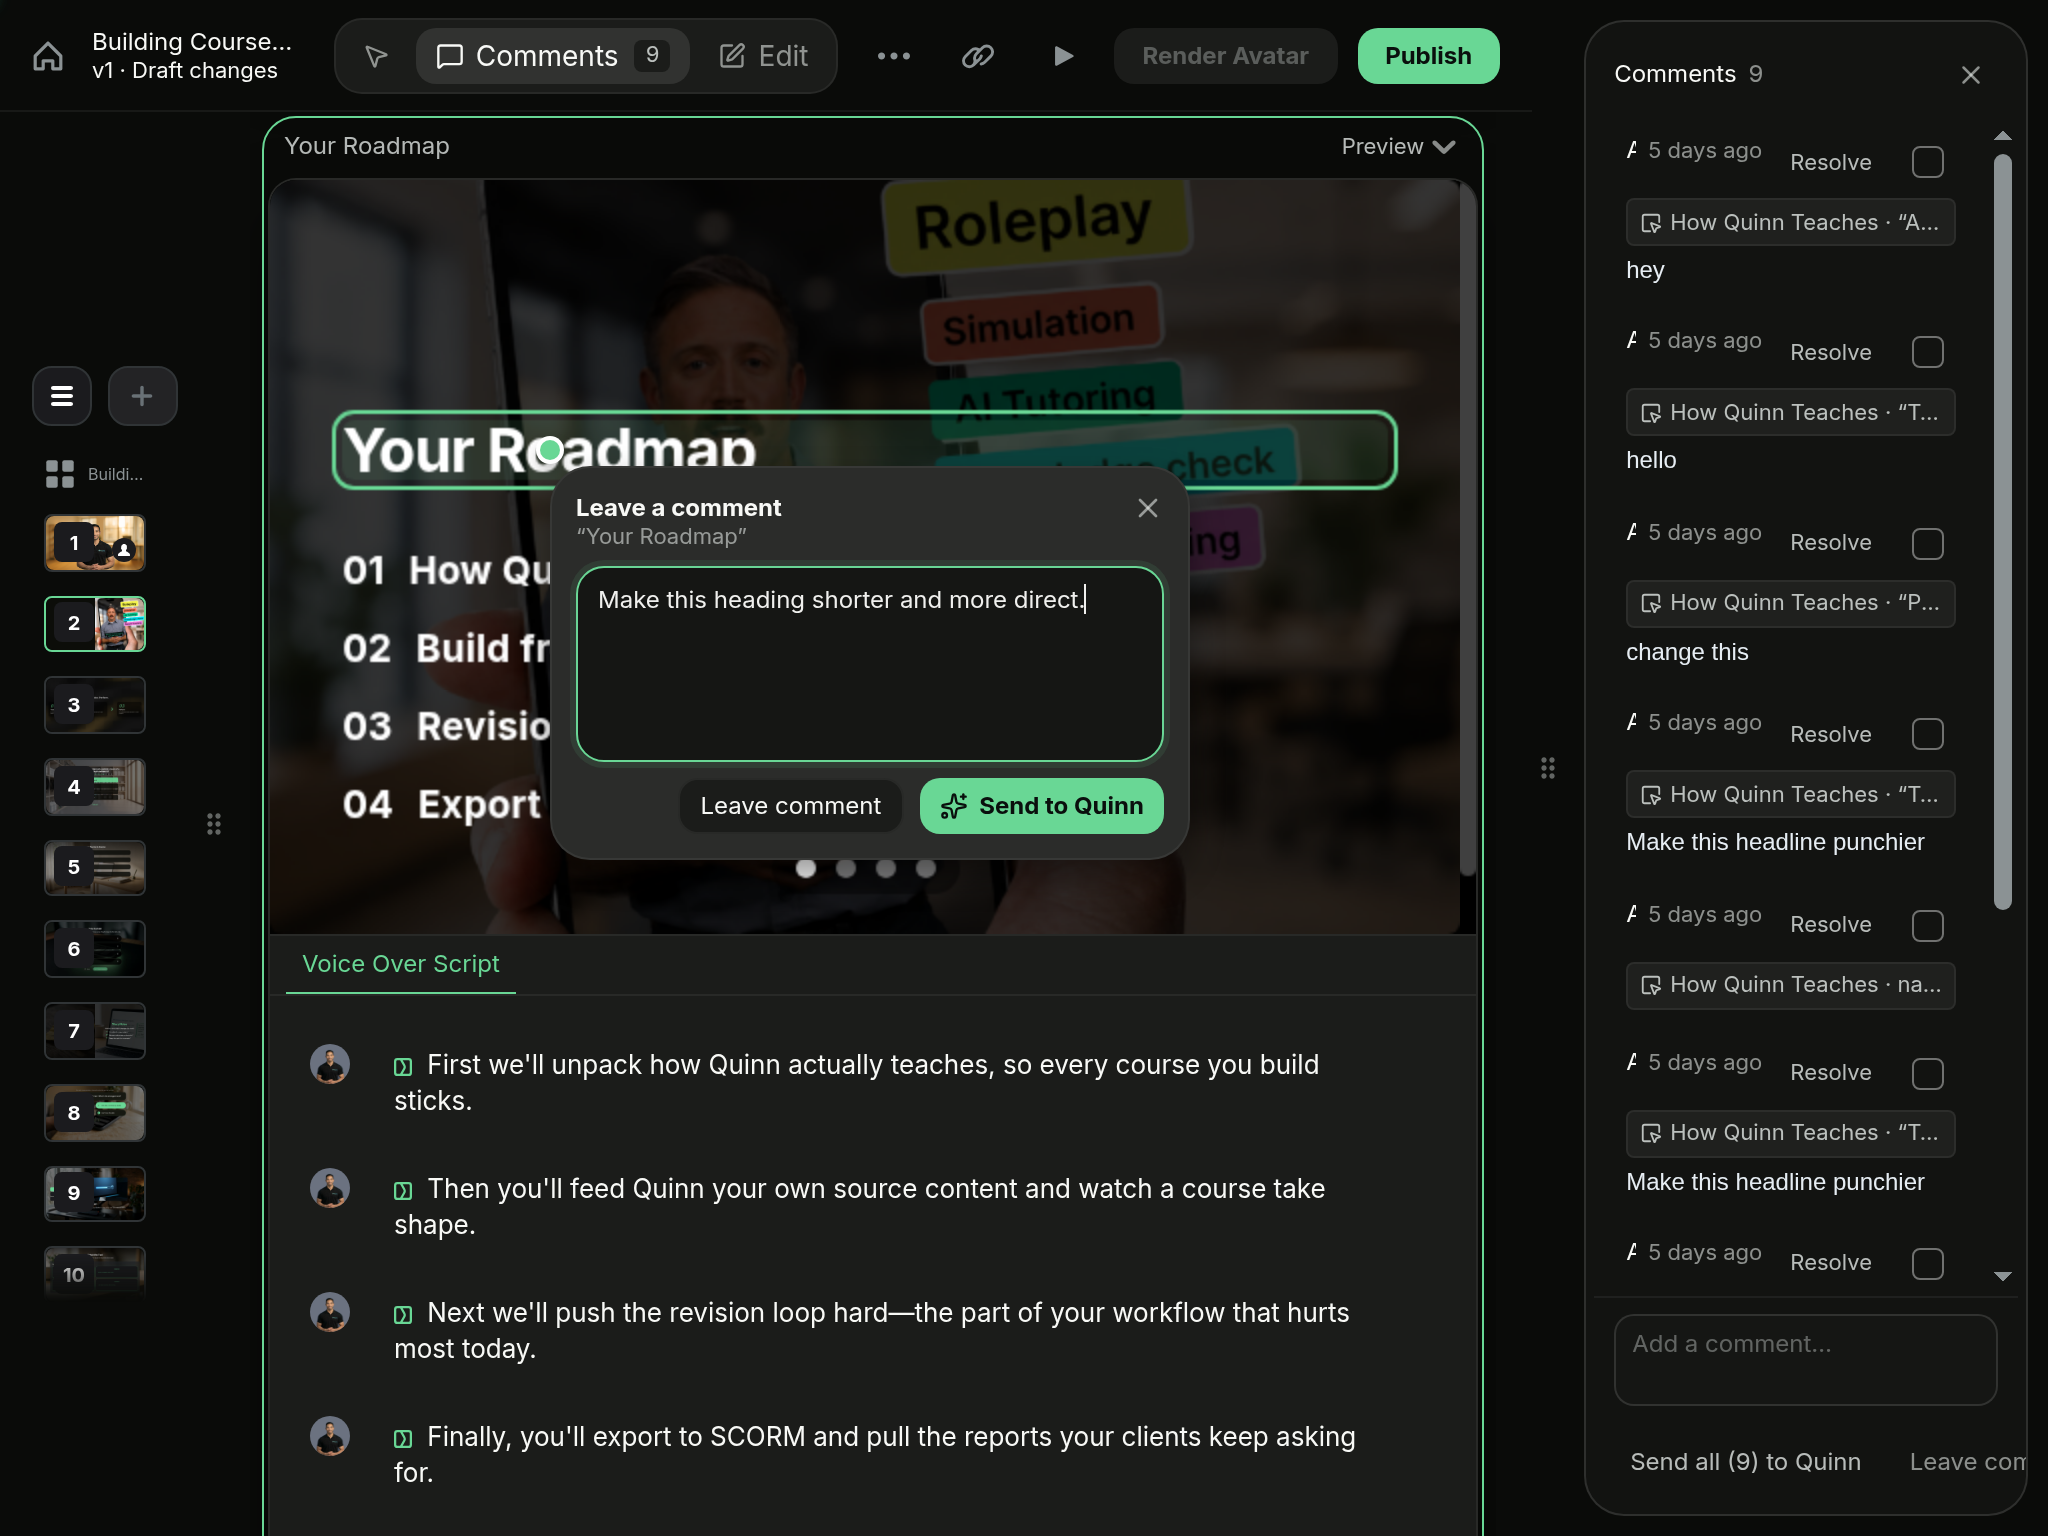
Click any element — a heading, a card, an image, even the voiceover script. A comment popup appears pinned to that element.
Step 3: Write your instruction
Type what should change in the Leave a comment popup. Write it as an instruction, not a note to yourself: "Make this heading shorter and more direct."
Step 4: Choose what to do with it
Click Send to Quinn to hand the instruction to Quinn right away — Quinn turns it into an action immediately. Or click Leave comment to save it to the feedback shelf and keep reviewing.
💡 Tip: Press Ctrl+Enter (or Cmd+Enter on Mac) to send without reaching for the mouse.
Step 5: Work through the feedback shelf
Your saved comments collect in the right-hand Comments panel with a running count — the same number shown next to Comments in the mode pill. From there you have three ways to send them to Quinn:
- Send all (N) to Quinn — send every open comment at once.
- Step through the comments one at a time and act on each.
- Click a single comment and send just that one.
Step 6: Resolve what's done
When Quinn has handled a comment, click Resolve to clear it from the count.
Edit mode: edit content and images yourself
Step 1: Switch to Edit
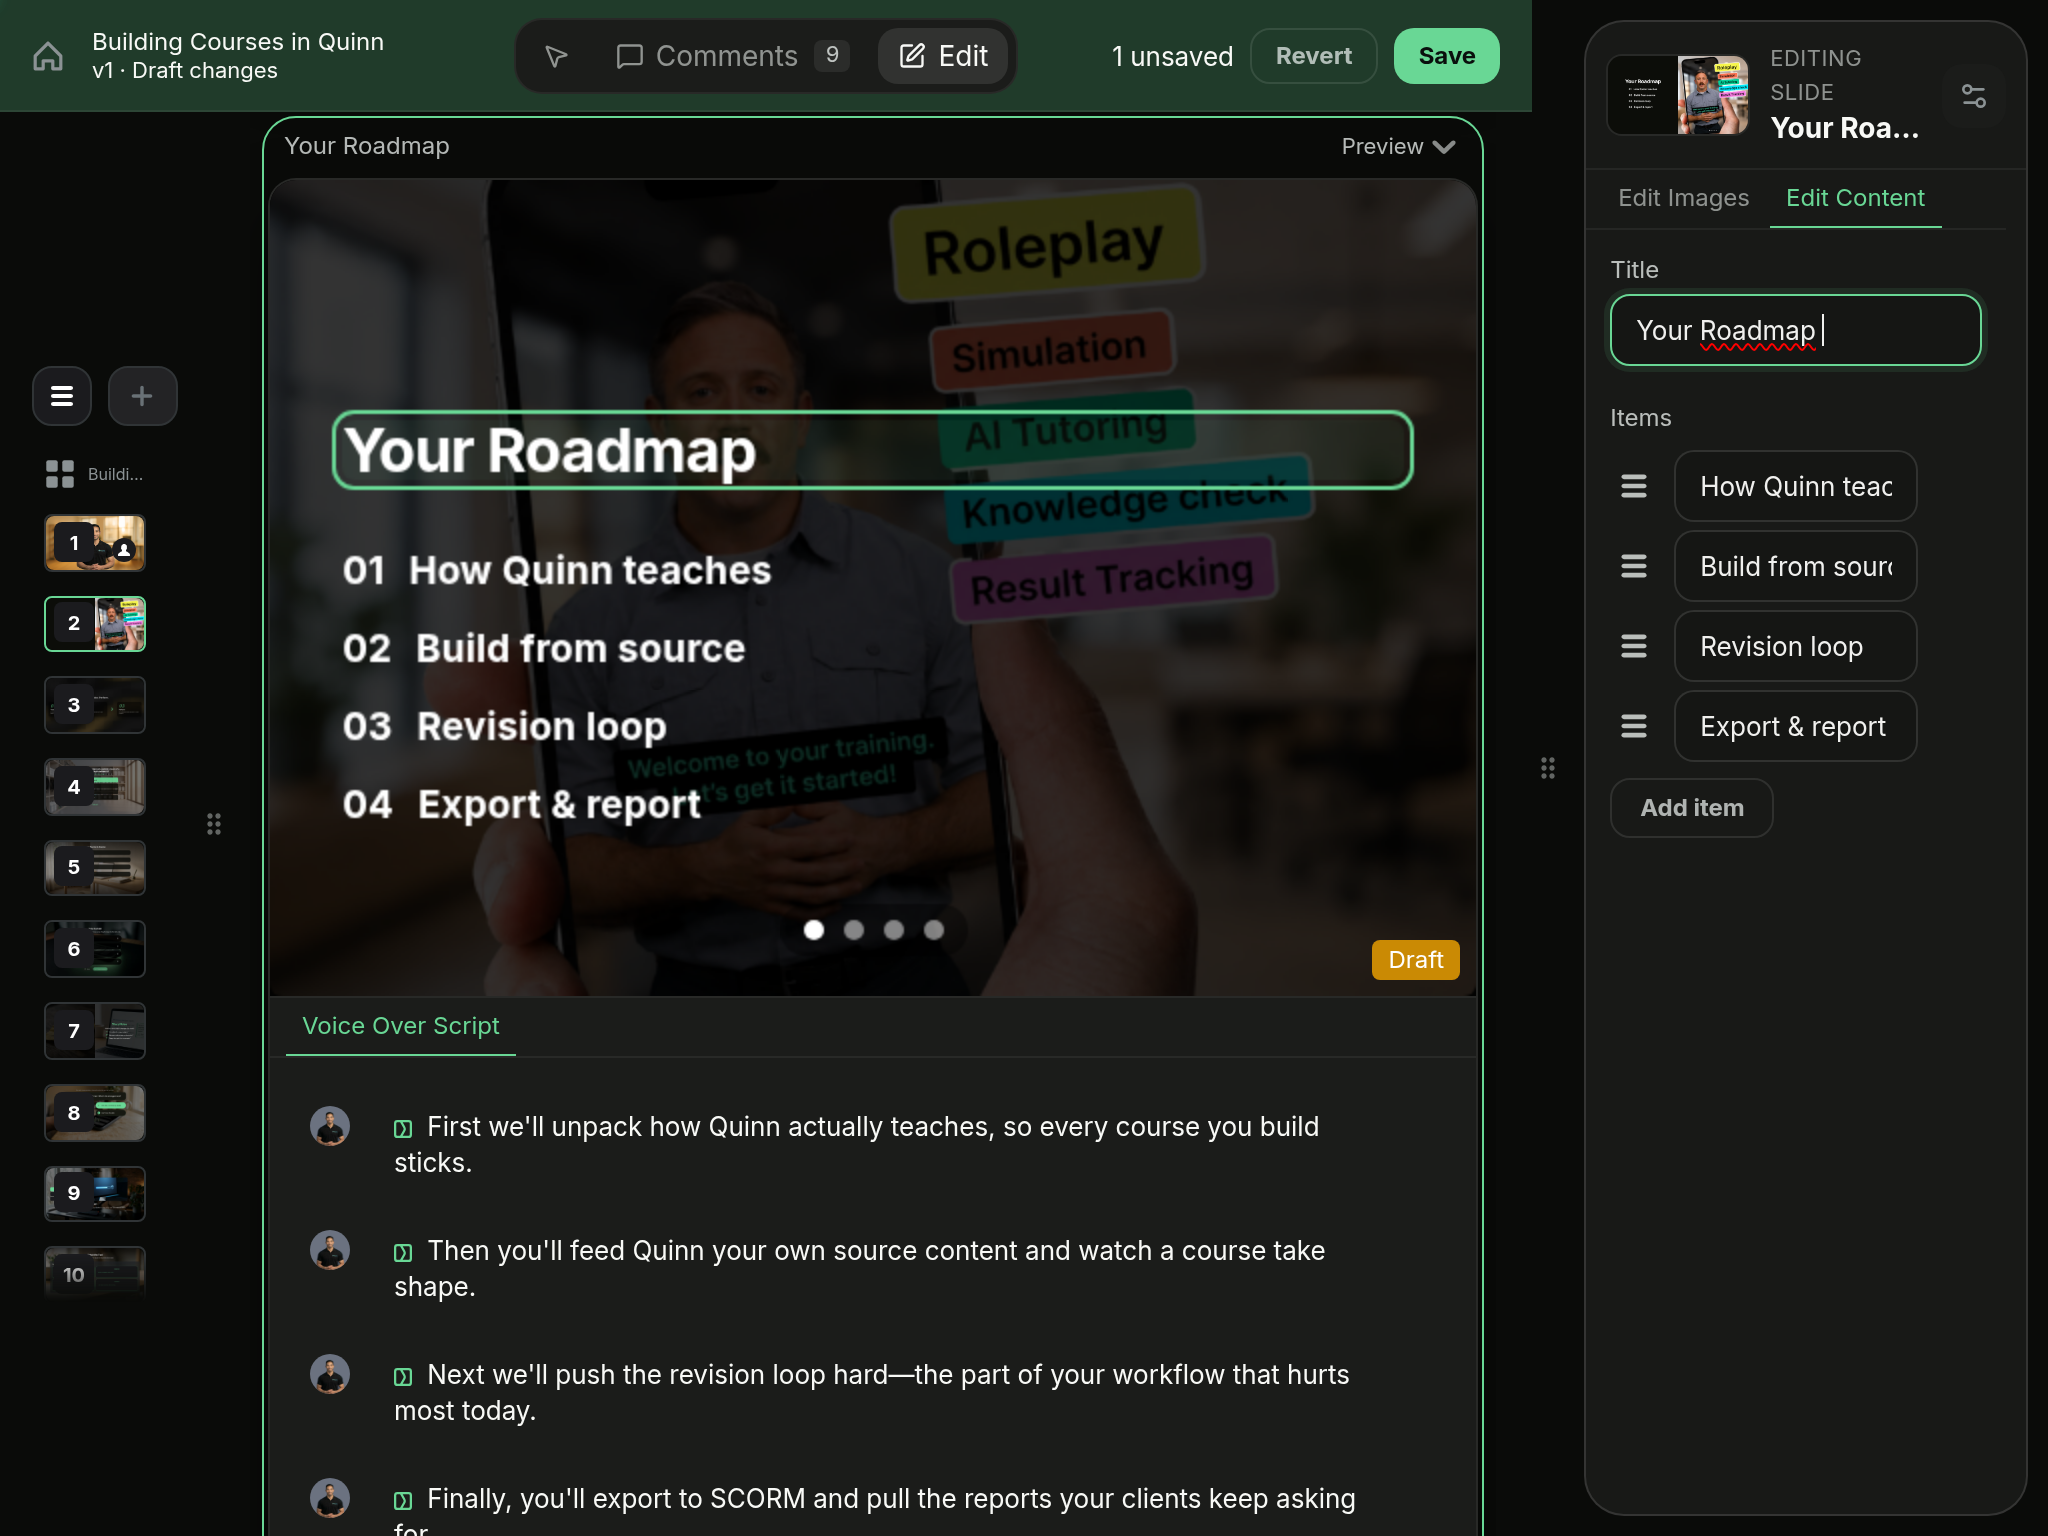
Click Edit in the mode pill. The right-hand panel becomes the slide editor, with Edit Images and Edit Content tabs.
Step 2: Edit the content
Click any element on the slide. Its content appears under Edit Content in the right-hand panel, ready to edit directly.
On a question slide, click into the question or an answer on the slide itself to change its text. For bigger changes, such as adding an answer choice or rewriting the whole question, switch to Comments and tell Quinn what you want.
Step 3: Change an image
Open the Edit Images tab in the right-hand panel. Each image on the slide has its own card. Click Replace to pick a new image, or Upload if that spot doesn't have one yet.
Step 4: Edit the voiceover
The Voice Over Script sits right under the slide. Click into it to change the narration text directly.
Step 5: Keep editing
Make as many changes as you need across any slides. The top bar turns green and shows how many slides have unsaved changes, for example 1 unsaved.
Step 6: Save
Click Save. Quinn rebuilds each edited slide and re-syncs the narration so the voiceover matches your new text.
💡 Tip: Changed your mind? Click Revert to throw away all unsaved edits in this session.
Step 7: Check it in Preview
Click the play button to watch the updated slides in Preview as a learner. If something still isn't right, switch back to Comments and tell Quinn — or hop into Edit and fix it yourself.