Set a Course to Private
📌 Overview
Setting a course to private hides it from other admins in your organization — only you (the course creator) can see and manage it. This is useful when you're still building or reviewing a course and don't want it visible to the rest of your team yet.
✅ Step-by-Step Instructions
Step 1: Go to the Courses Page
From the left sidebar, click Courses to open your course library. You'll see a list of all courses in your organization, including any that are already private.
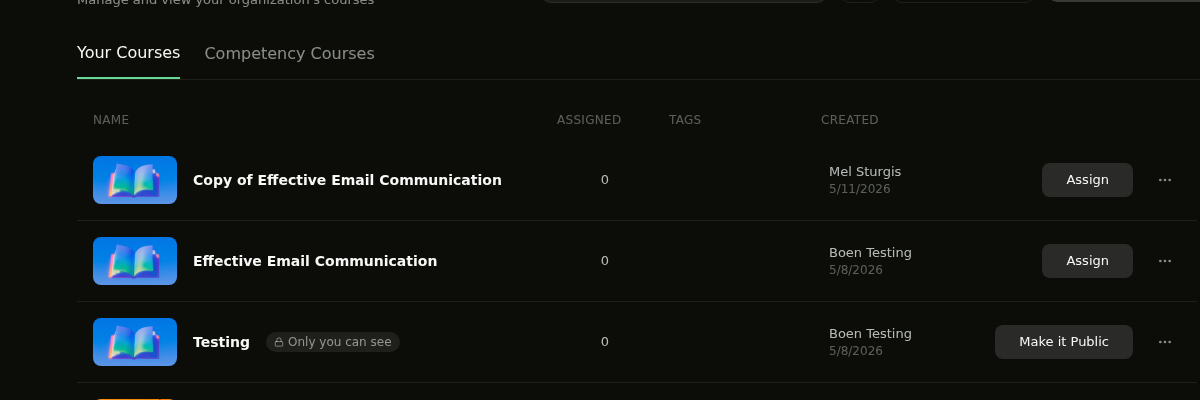
💡 Tip: Private courses display an "Only you can see" label next to the course name, so you can quickly tell which courses are hidden.
Step 2: Open the Course Options Menu
Find the course you want to make private, then click the three-dot menu (⋮) on the right side of that course row. A dropdown menu will appear with several options including Make it Private.
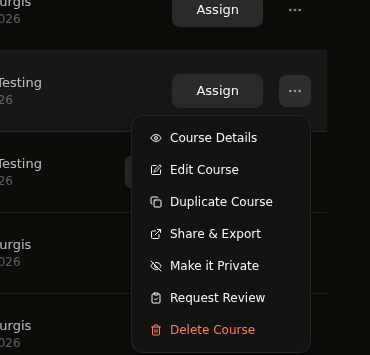
💡 Tip: The Make it Private option only appears for courses you created and that have no learners currently assigned. If you don't see it, check whether the course has active assignments — you'll need to unassign learners first.
Step 3: Select "Make it Private"
Click Make it Private from the dropdown. The course is set to private immediately — no confirmation dialog is needed.
Step 4: Verify the Course is Private
After making a course private, you'll notice two changes in the course list:
- An "Only you can see" label appears next to the course name.
- The Assign button is replaced with a Make it Public button.

💡 Tip: To make the course visible again, click the Make it Public button directly from the course list — no need to open the menu.
💡 Tips
A private course is only visible to the person who created it. Other admins in your organization won't see it in their course list.
You can only make a course private if it has no assigned learners. Remove all assignments first if you need to set an active course to private.
Making a course public again instantly restores it in the course list for all admins and allows you to assign it to learners.