Schedule Program Course Releases
📌 Overview
A program normally makes all of its courses available the moment it's assigned. With the program's Delivery timeline you can drip them out instead — release the first course right away, the next a week later, the one after that a few days behind it — and add your own emails and texts between them, so learners hear from you as each course opens.
Every date is relative to the date the program was assigned to that learner, so the same timeline works no matter when someone joins. Saving a Delivery timeline also replaces the generic assignment notification, so learners get your message instead of Quinn's default one.
Step 1: Open Delivery
Open the program from the Programs page and click Delivery in the top-right.
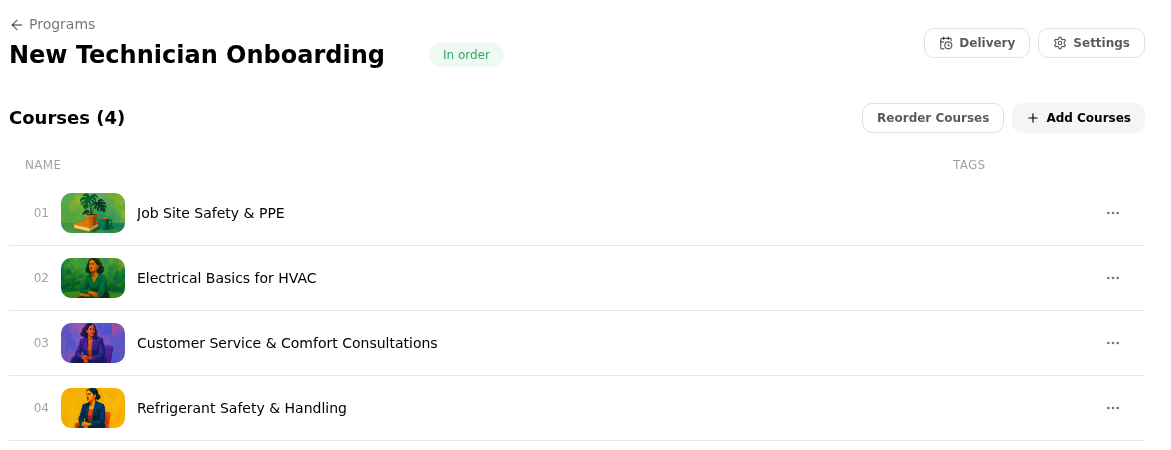
💡 Tip: Course release rules used to live on the settings page — they're now on this Delivery timeline, alongside your messages.
Step 2: Read the timeline
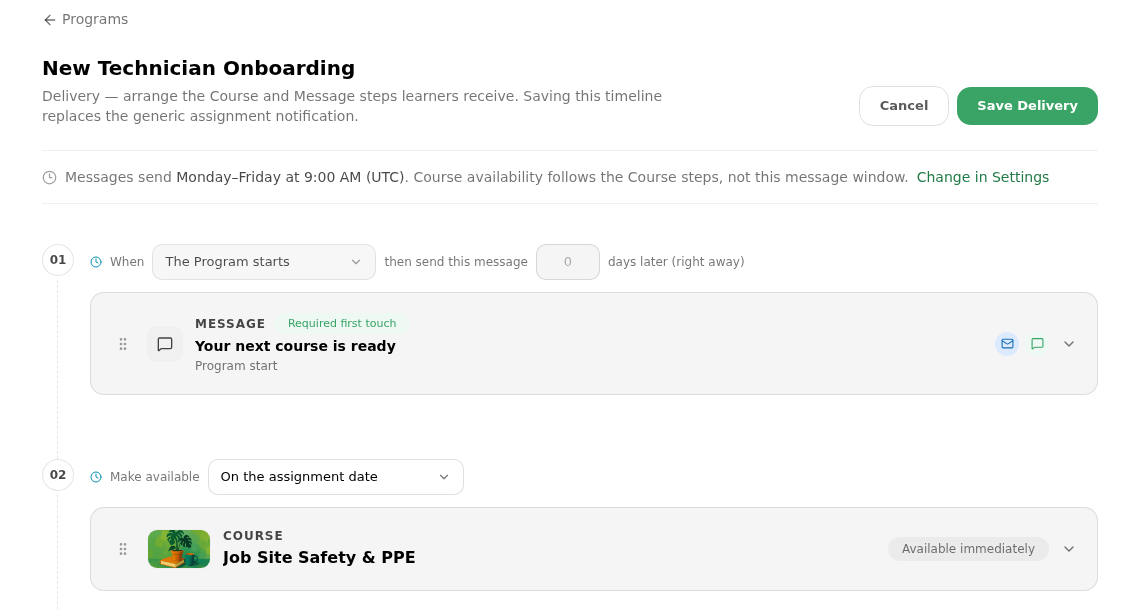
The timeline is a numbered list of steps in the order learners experience them. Course steps control when a course becomes available, Message steps are the emails and texts you send along the way. The first step is a Message marked Required first touch — the one that goes out when the program starts.
Step 3: Choose when each course becomes available
On a Course step, pick a rule from the Make available dropdown:
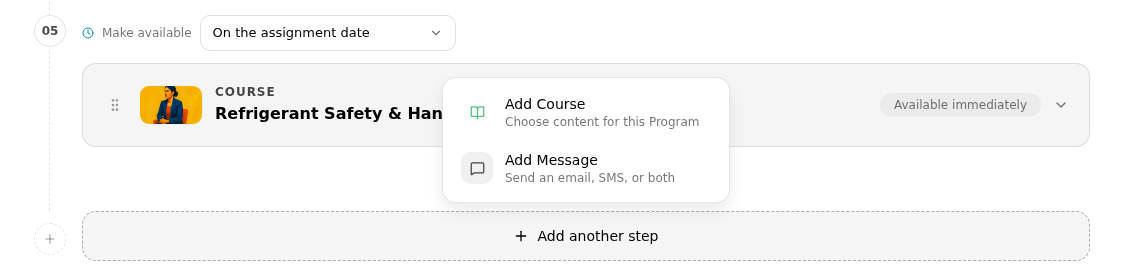
- On the assignment date — available as soon as the program is assigned.
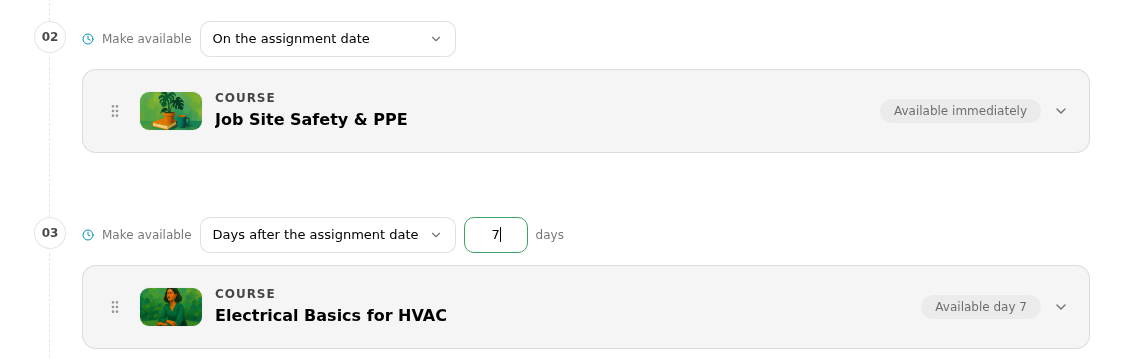
- Days after the assignment date — a fixed number of days after the program lands.
- Days after the previous course — chained to the course above it, so shifting one course moves everything after it.

Step 4: Set the number of days
For either of the "days after" rules, enter the number of days next to the dropdown. The badge on the course reads back what you chose — Available immediately, Available day 7 — so you can read the whole rollout down the timeline.
💡 Tip: Drag the handle on the left of any step to reorder your timeline — course availability and message timing follow the step you move.
Step 5: Write the message learners get
Expand a Message step to write it. Switch between Email and SMS, set the subject and body, and drop in tokens like {{learner.firstName}}, {{program.name}}, {{course.name}} and {{course.link}} so each learner gets their own details. Upload adds an image or GIF, the preview on the right shows the result, and Send test sends it to you before anyone else sees it.
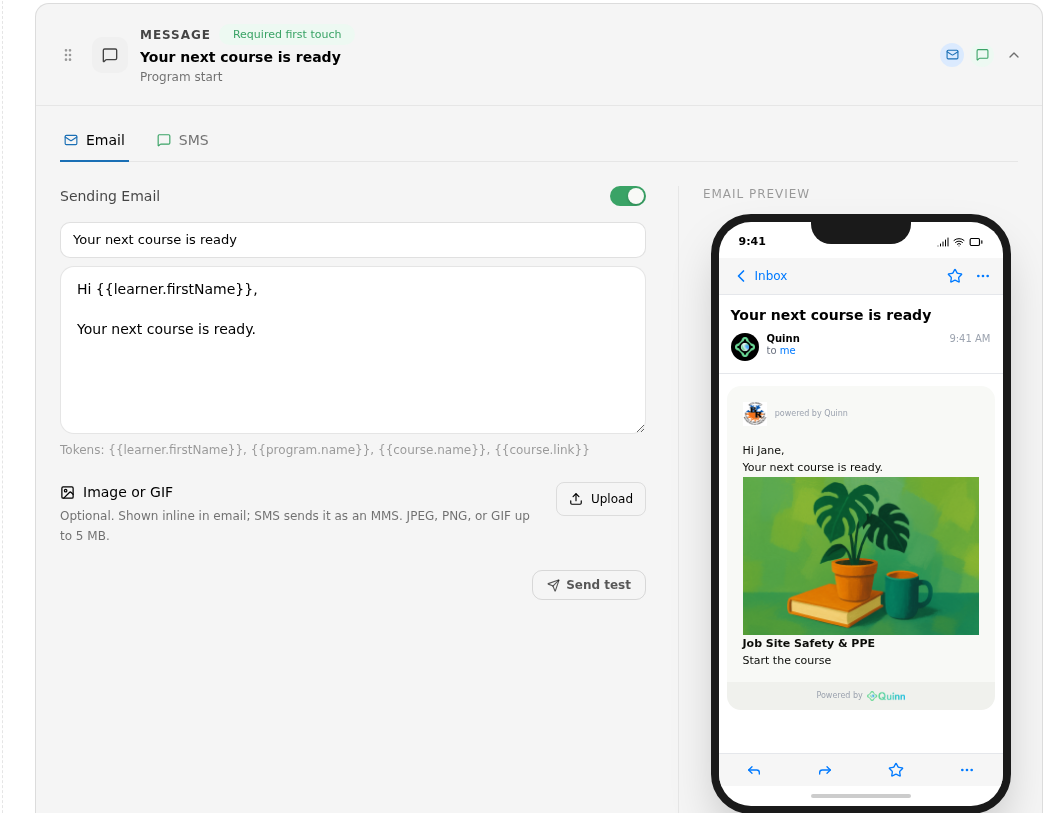
💡 Tip: Turn Sending Email off on a step to pause that message without deleting the copy you've written.
Step 6: Add more steps
Add another step at the bottom of the timeline gives you Add Course to bring in more content, or Add Message to send an extra email, SMS, or both — a nudge halfway through, or a congratulations at the end.
Step 7: Save the timeline
Click Save Delivery at the top of the page. The timeline applies to everyone the program is assigned to, including members assigned later. Cancel discards your edits.
Step 8: Set the message delivery window
Messages don't go out at all hours. Click Change in Settings on the Delivery page to open Message delivery window, where you choose the Timezone, Send messages at time, and which days under Send messages on — weekdays at 9:00 AM by default. Course availability ignores this window and always follows the Course steps.
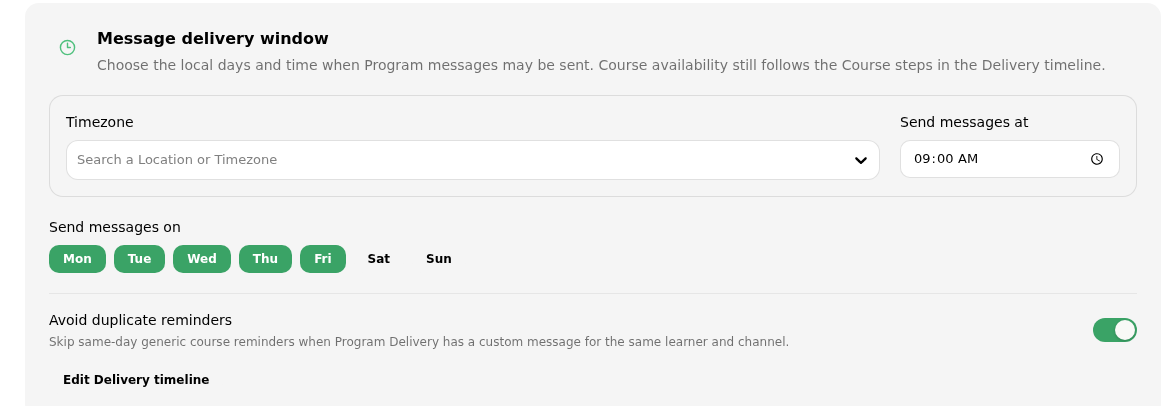
💡 Tip: Leave Avoid duplicate reminders on so Quinn skips its own generic course reminder when your Delivery timeline already has a message going to that learner the same day on the same channel.
💡 Tips
- Courses you add to the program after saving default to releasing on the assignment date — revisit Delivery to give them their own rule.
- Setting every course back to On the assignment date releases the whole program immediately again.
- Edit Delivery timeline on the settings page takes you back to the timeline without going through the program page.
- Course releases pair well with Score-Gated Course Progression when you want both a release date and a passing score before learners move on.