Setting Up Groups
📌 Overview
After adding members, you can organize them into groups to make it easier to assign courses, track progress, and manage training by team or department.
Watch the tutorial video above
Step 1: Go to the Groups Tab
Navigate to the Groups tab in your Quinn dashboard.
Click Create Group.
Step 2: Set Up the Group
Enter a group name.
Select the members you want to include.
Click Create Group.
Step 3: Your Group Is Ready
Your group will be created and ready to use. You can now assign courses or programs to the group, add or remove members, and track progress together.
📌 Pin a Group Org-Wide
Once you have a lot of groups, pinning keeps the ones you use most at the top of the list. Pins are shared across your whole organization, so a group you pin is pinned for every admin.
Step 1: Pin a group from the list
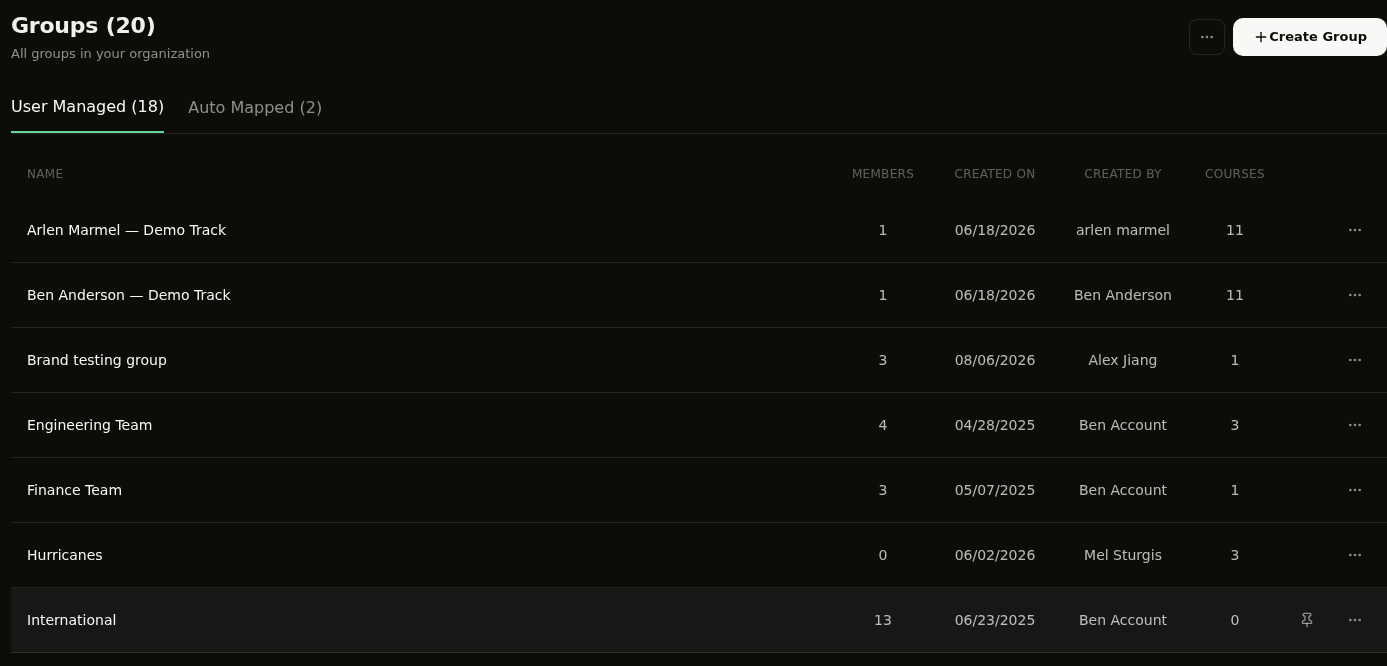
On the Groups page, hover over the group's row and click the pin icon (Pin this group for easier access) next to the ... menu.
Step 2: Find it in the Pinned section
The group moves into a Pinned section at the top of the page, above both the User Managed and Auto Mapped tabs — so it stays visible no matter which tab you're on. To remove it, click the same icon again (Unpin this group) and the group returns to its original tab.
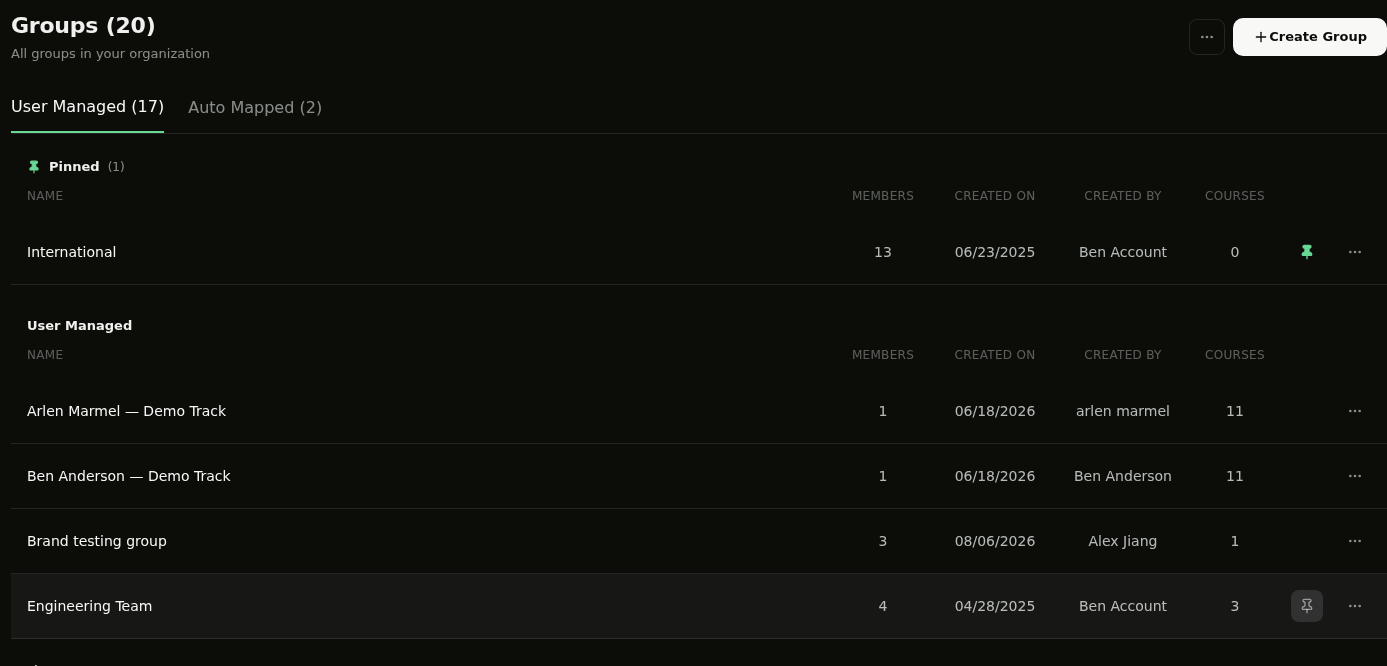
💡 Tip: Pinned groups are counted in the Pinned section rather than in their tab, so the tab counts drop by one for each group you pin.
🔗 Sync Groups from Your HRIS
You can also sync your groups from your HR system using Connect HRIS, so your organizational structure stays automatically aligned without manual updates.
💡 Tips
Create groups by role, department, or location to make course assignment and tracking easier.
You can add or remove members from a group at any time after it's created.
Groups make it easy to assign a course to many people at once without selecting individually.